
Create a new campaign
If no document collection has yet been created, the tab displays the message ‘No document collections — Create your first document collection’. The ‘+ New collection’ button is available at the top right of the screen.
To create a new document collection, click on “+ New collection”. A window will open with the following fields to complete:
- Collection name (give your campaign a clear name: e.g. “Diploma collection”)
- Document type (select the expected document type from the list: e.g. “Diplomas”)
- Deadline (set the date by which employees must submit their documents)
- Target folder (select the folder in which the collected documents will be automatically stored)
- Description (you can add a description: e.g. ‘instructions’ or ‘context of the collection’)
- Target (you can now select one, several, or groups of employees affected by the collection)
Once all fields have been completed, you can confirm the collection by clicking on ‘Create collection’. Weplanify automatically sends a notification to each targeted employee or group to inform them of the request and the deadline.
Automatic tracking and reminders
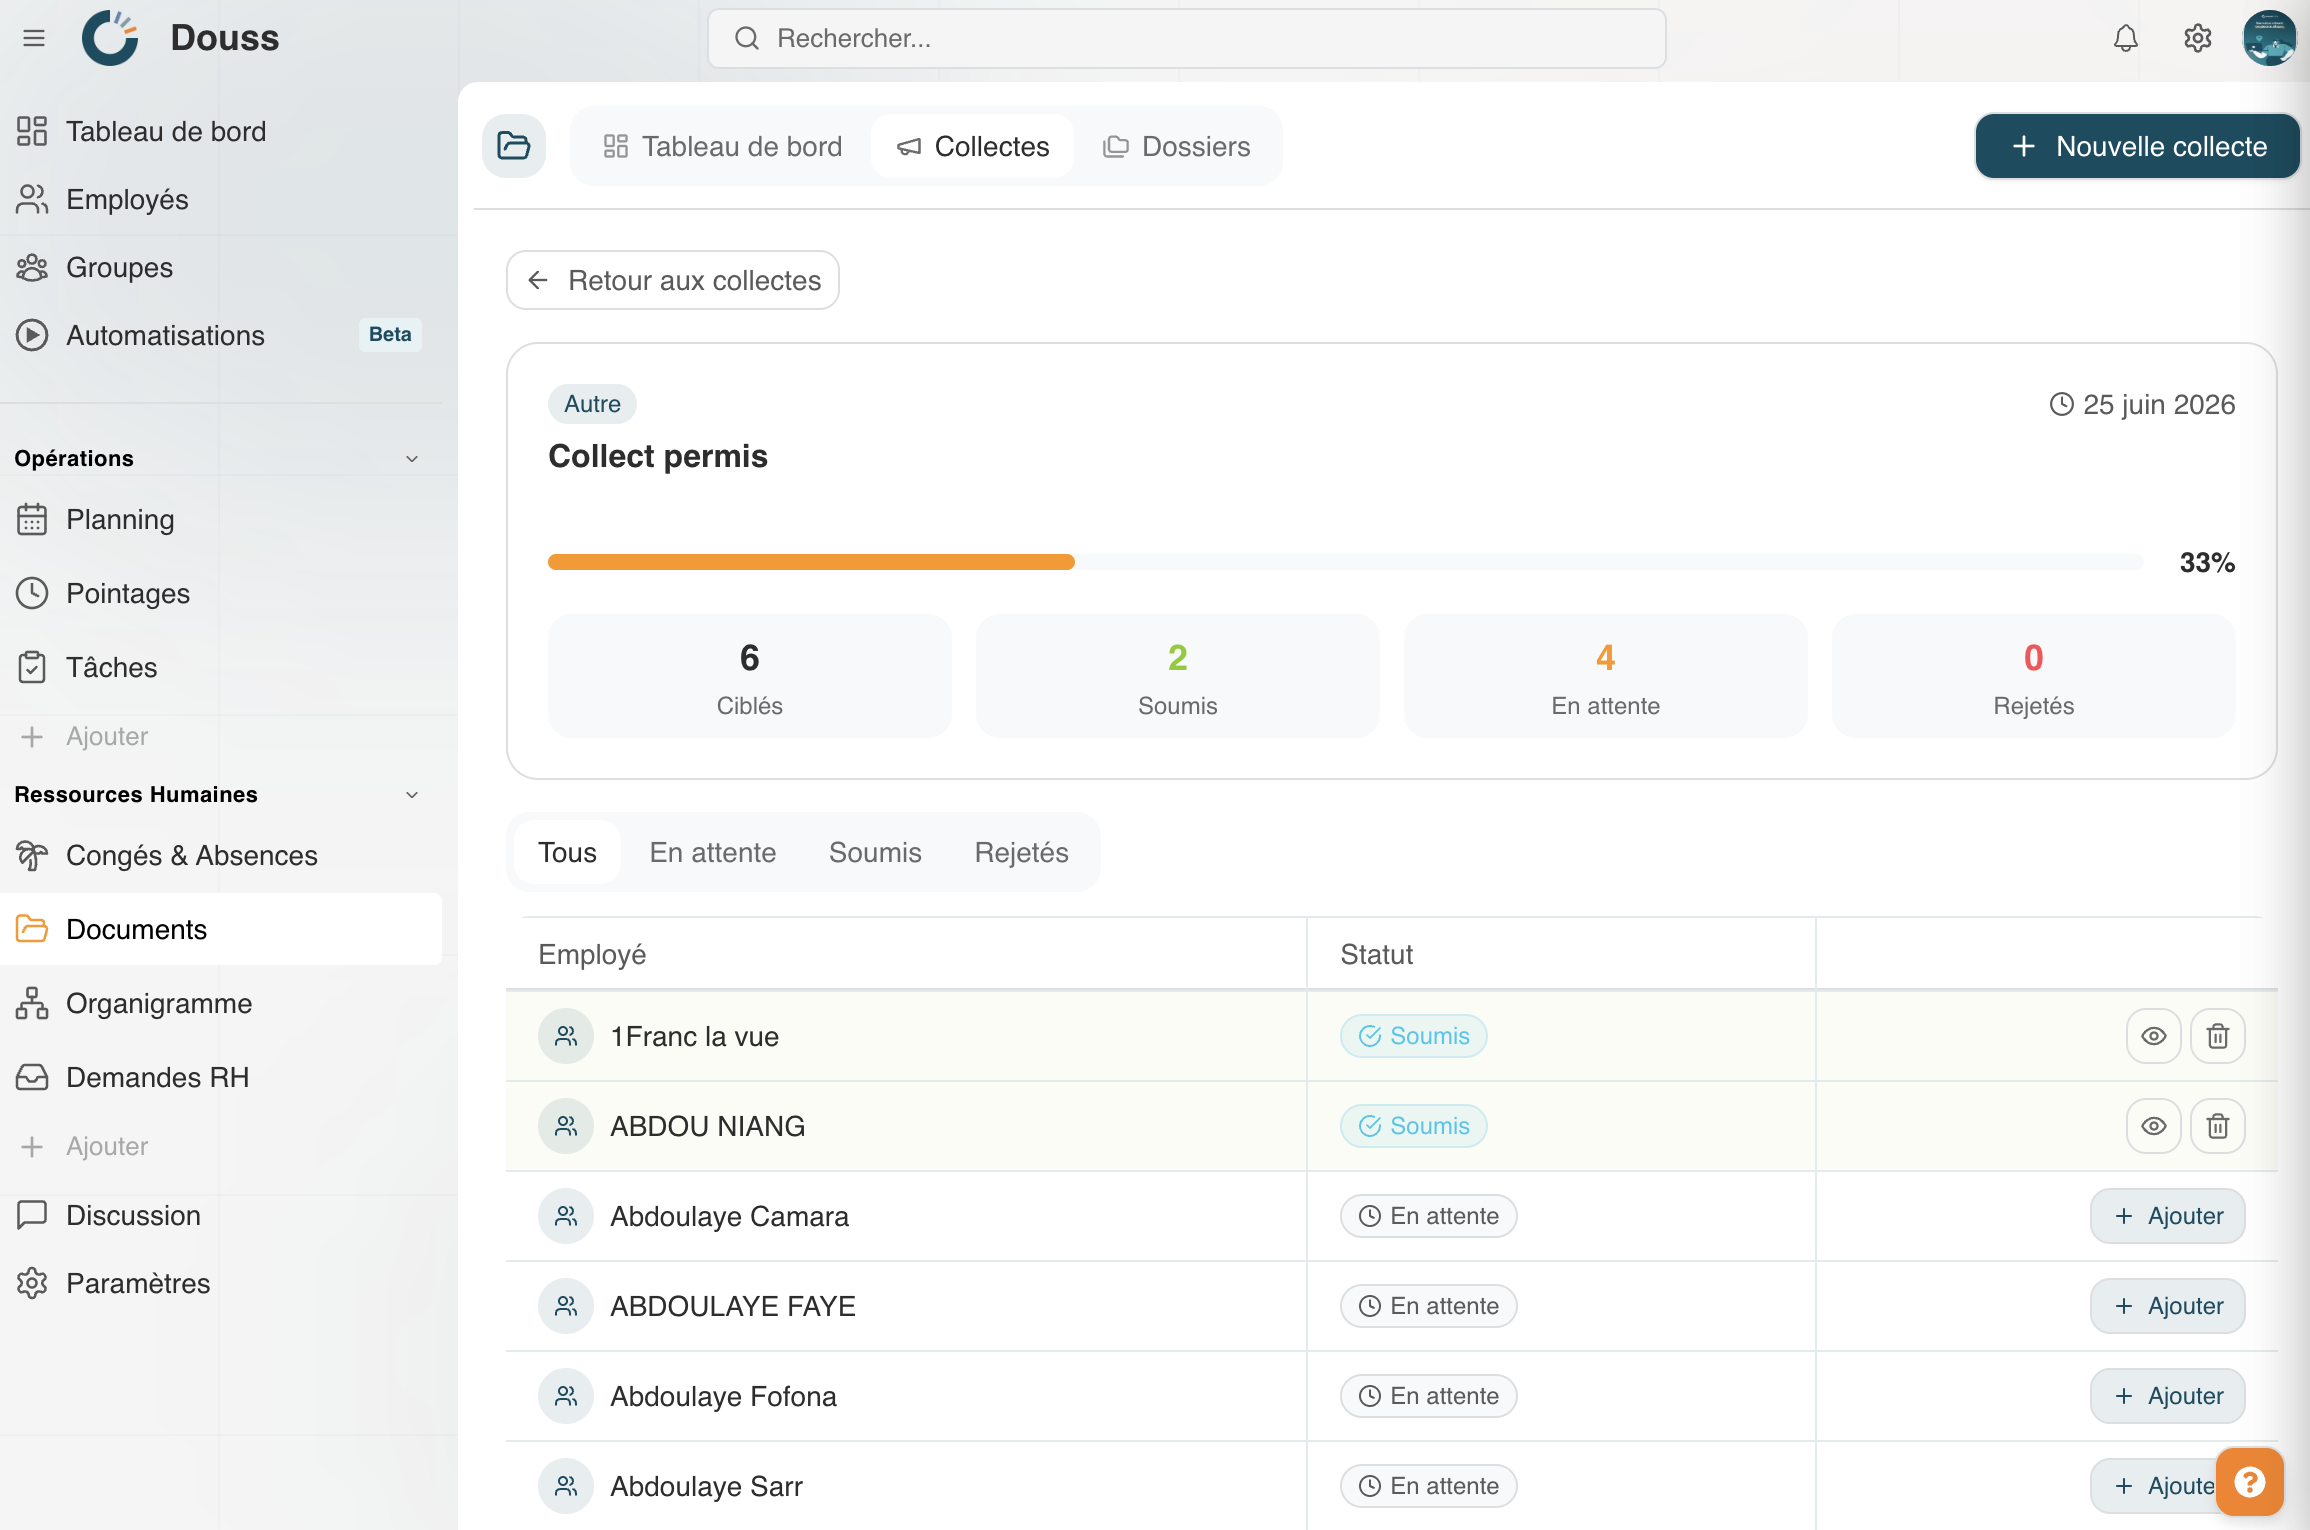
Once the collection has been created, it appears in the Collections tab and in the Active Collections panel on the dashboard. From the collection’s details page, you can:
- See in real time how many employees have submitted their documents and how many are still pending.
- Quickly identify employees who have not yet responded.
- Let Weplanify handle automatic reminders for latecomers.
- View the documents received directly from the collection page.
- Close the collection once all documents have been received.
Document Compliance
You can view an overview of your organisation’s document compliance at any time. Incomplete files are flagged, and expiry alerts allow you to plan for renewals before it is too late.
Tip: use the ‘Target folder’ option when creating a collection so that all documents received are automatically filed in the correct location, without any manual intervention.