
Record an expense
In Weplanify, record an expense starting from the receipt: its type, who paid, the amount, date and site concerned, then see what will happen next.
In Weplanify, an expense is entered starting from the receipt. Paid by the company, it counts in costs without touching payslips; advanced by an employee, it is repaid on their pay.
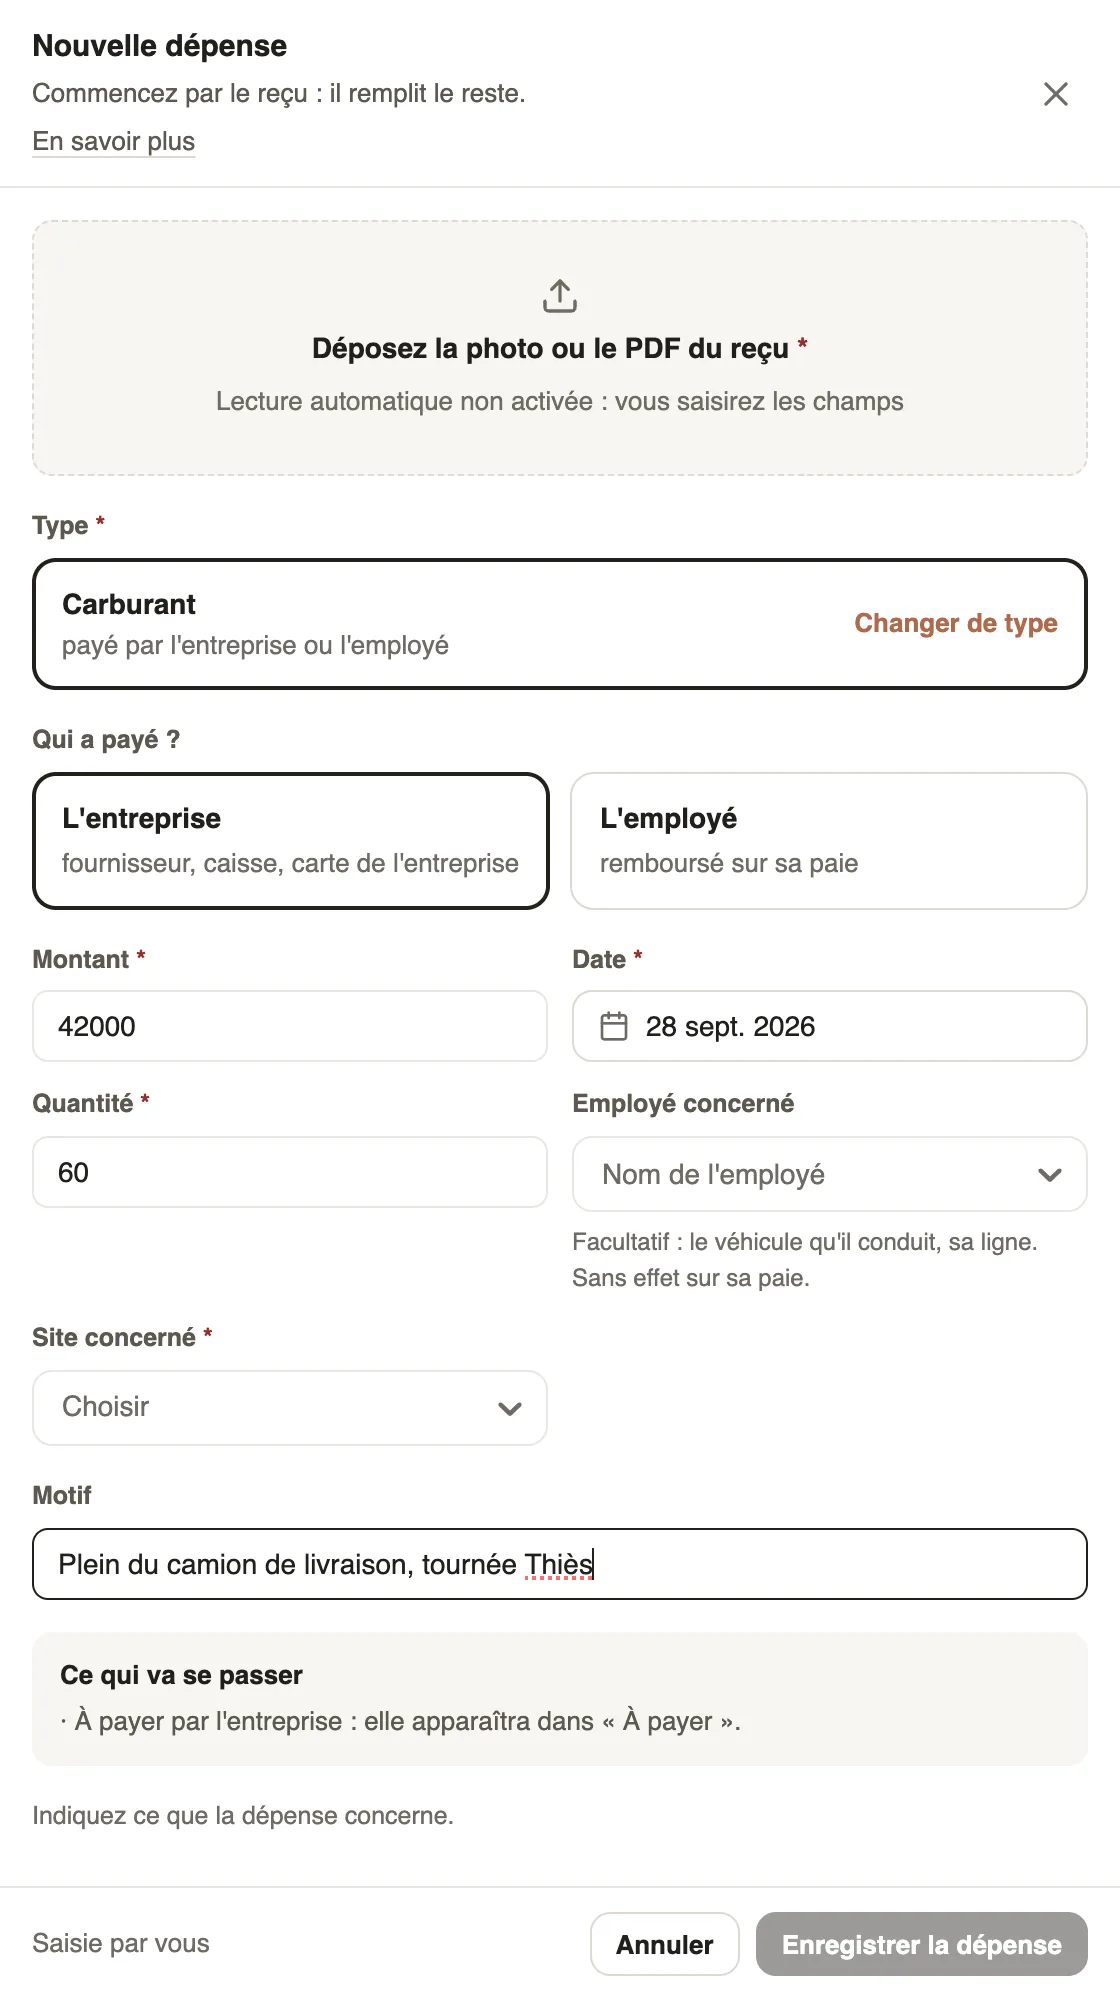
Steps
- In Expenses, click New expense.
- Drop the photo or PDF of the receipt.
- Choose the Type: each type says who pays for it (see expense types).
- If the type asks, answer Who paid?: the company or the employee.
- Enter the Amount, the Date, the Quantity if asked, the Site concerned and a Reason.
- Read What will happen, then click Save the expense.
Good to know
- The Employee concerned is optional (the vehicle they drive, their phone line): it has no effect on their pay.
- If automatic receipt reading is on for your company, the amount, date and merchant fill in by themselves: check them.
- For a mistake: correct or cancel an expense.
Go further
Correct or cancel an expenseIn Weplanify, edit an expense while its payroll is open, or cancel it in full or in part: it stays in the history and in the entries, offset.Create an expense typeIn Weplanify, an expense type (fuel, meals, road tolls) decides who pays, how the amount is computed, what must be attached and who approves it.Follow the company's expensesIn Weplanify, the Expenses screen gathers purchases paid by the company and costs advanced by employees: to approve, to reimburse and to pay.Set the accounting and questions of an expense typeIn Weplanify, give an expense type its category, its expense and counterpart accounts and VAT, and add your own questions to the entry form.