
Find your way in Weplanify: menu and top bar
In Weplanify, the left menu sorts the screens into four sections, and the top bar gathers the search, the help, the notifications and your account.
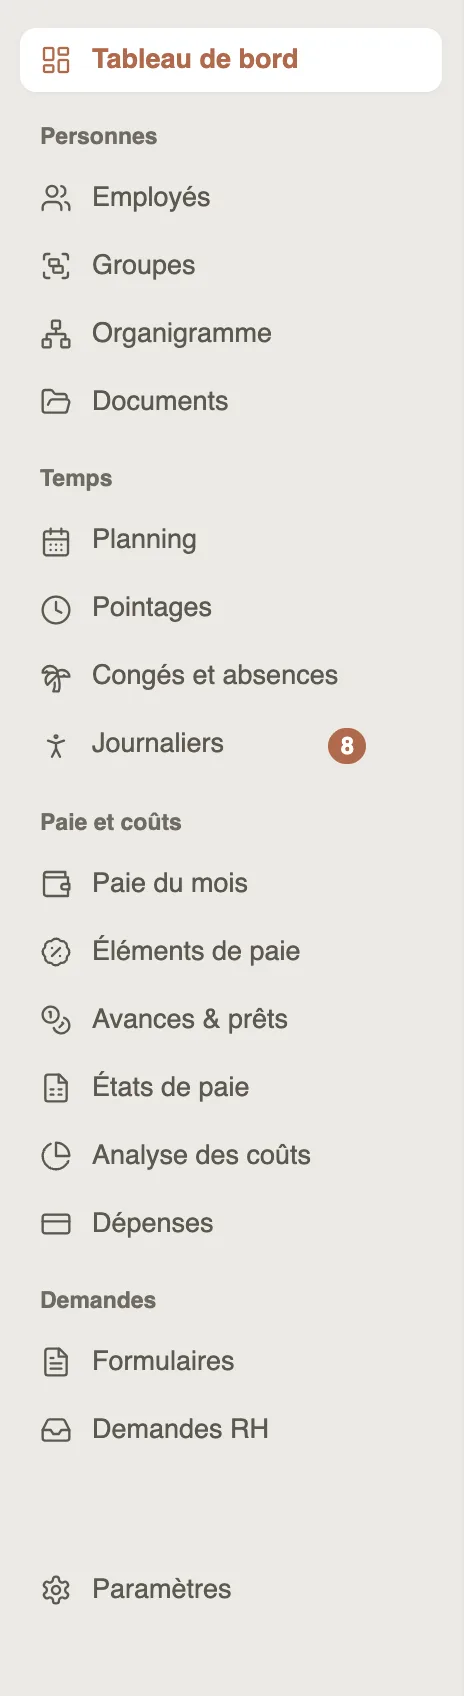
In Weplanify, the left menu starts with the Dashboard and ends with Settings; in between, four sections: People, Time, Payroll and costs and Requests.
The menu
- People: employees, groups, org chart, documents. Time: planning, time entries, leave and absences, day labourers.
- Payroll and costs: monthly payroll, pay elements, advances and loans, payroll statements, cost analysis, expenses. Requests: forms and HR requests.
- The ☰ button collapses or expands the menu. When hovering an entry, the ⋮ button offers Rename or Remove from menu; Add, at the bottom of a section, brings it back.
The top bar
- The search (⌘ K or Ctrl K) finds a screen by its name.
- The Guide button opens the page's help; the bell, the notifications; then the branch choice.
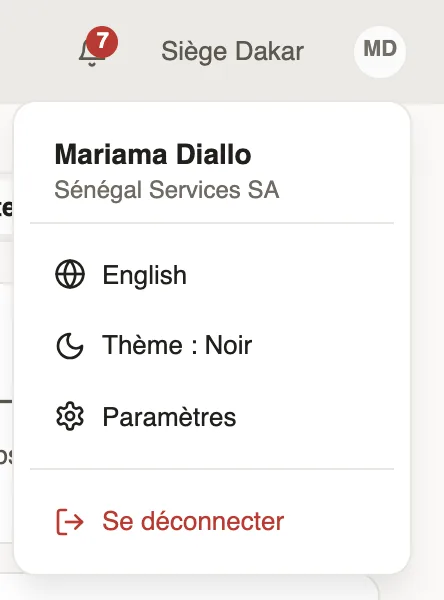
- Your initials open the account menu: language, light or dark theme, settings and log out.
Good to know
- An entry only shows if you have access to the module; the Payroll and costs section only shows if your company runs payroll in Weplanify, and most of its screens require payroll access.
- Renaming or hiding an entry only applies to this browser.
Go further
Open a screen's help without leaving itIn Weplanify, the Guide button or the ? key opens the screen's help in a side panel, with the page's buttons and the articles to go further.A manager's access by module: none, view or manageIn Weplanify, a manager only opens the chosen modules, for the employees of their groups: View to consult, Manage to create, edit and approve.Branches: agencies and payroll countriesIn Weplanify, a branch is an agency of the company: its country decides the payroll rules applied to its employees; create one for each country.Create your Weplanify workspace with the wizardIn Weplanify, the setup wizard creates your company in five steps: company, business and jobs, working hours, modules, then getting started.