
Create your Weplanify workspace with the wizard
In Weplanify, the setup wizard creates your company in five steps: company, business and jobs, working hours, modules, then getting started.
In Weplanify, a wizard guides you right after the account is created. It takes about 3 minutes, and everything can be changed later in the settings.
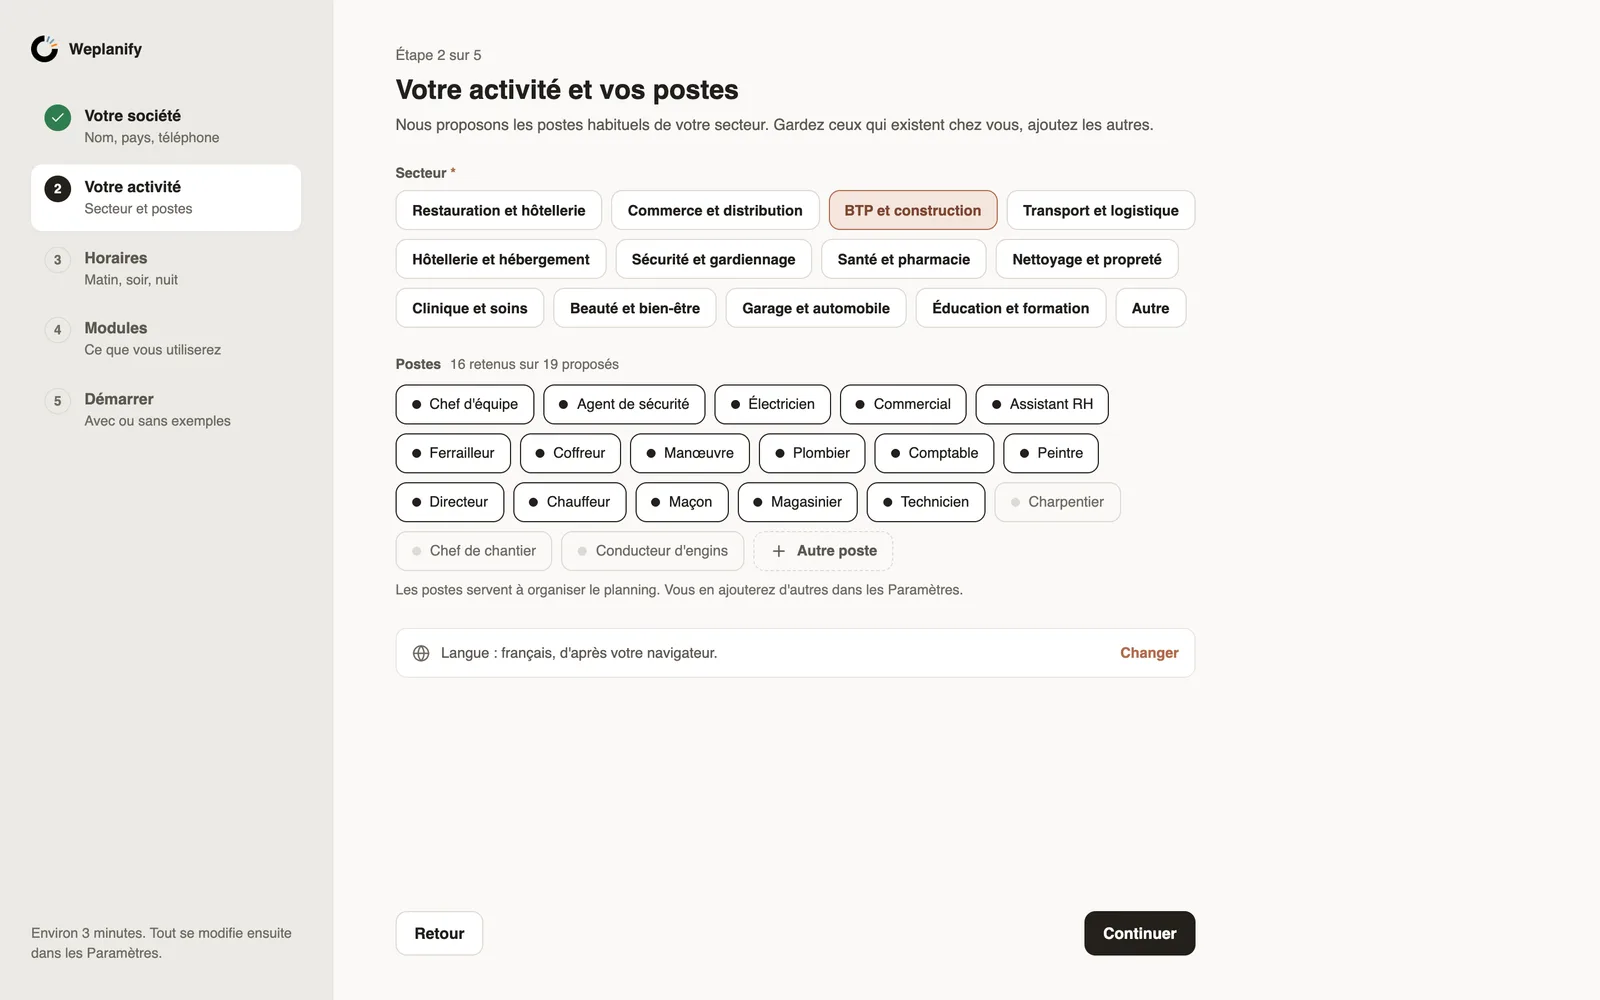
Steps
- On the sign-in page, click Create an account, then enter your email and a password, or Continue with Google.
- Your company: company name, country (it sets the payroll rules and public holidays), your name, your role and your phone.
- Your business: choose the sector, keep the suggested jobs that exist in your company and add the others with Other position.
- Hours: set the start, end, break and working days of the Morning, Evening and Night shifts, or mark them "Not used".
- Modules: choose what appears in the menu.
- Start: choose With samples or With an empty workspace, read the summary, then click Start.
Good to know
- The language follows your browser; Change, at the bottom of the step, switches it.
- A first site named after the company is created; rename it or add others in sites.
- If you leave halfway, the Getting started list offers Resume.
- Hiding a module removes no right: the entry comes back with Add in the menu.
Go further
Your company settings in WeplanifyIn Weplanify, settings are sorted by theme in a menu on the left: company, approvals, expenses, time and attendance, leave, payroll and account.Create and set up a siteIn Weplanify, declare your workplaces, their geolocation clock-in area, their time zone and their own overtime rules, one site at a time here.The dashboard Getting started listIn Weplanify, the dashboard Getting started list shows what is left to do to get going, and each of its lines ticks itself once the step is done.Find your way in Weplanify: menu and top barIn Weplanify, the left menu sorts the screens into four sections, and the top bar gathers the search, the help, the notifications and your account.Company information, language and time zoneIn Weplanify, update the company's name, sector, address and phone number, the language used for notifications and the company's own time zone.Getting started with WeplanifyIn Weplanify, the web is for managers and the mobile app is for employees: here is where to start, from creating the account to the first published schedule.Sign in to Weplanify on the web and on mobileIn Weplanify, managers sign in on the web with their email address, and employees sign in to the mobile app with their phone number and a code.Try Weplanify with sample dataIn Weplanify, start with samples: fictitious employees, schedules, clock-ins and requests to try everything out, then remove them all with one click.