
Import an Excel file into Weplanify
In Weplanify, the import wizard goes through four steps, file, mapping, check and import, and writes nothing into your data before the very last one.
In Weplanify, a single import wizard is used for employees, contracts, sites, expenses and loans. Nothing is saved before the last step.
Steps
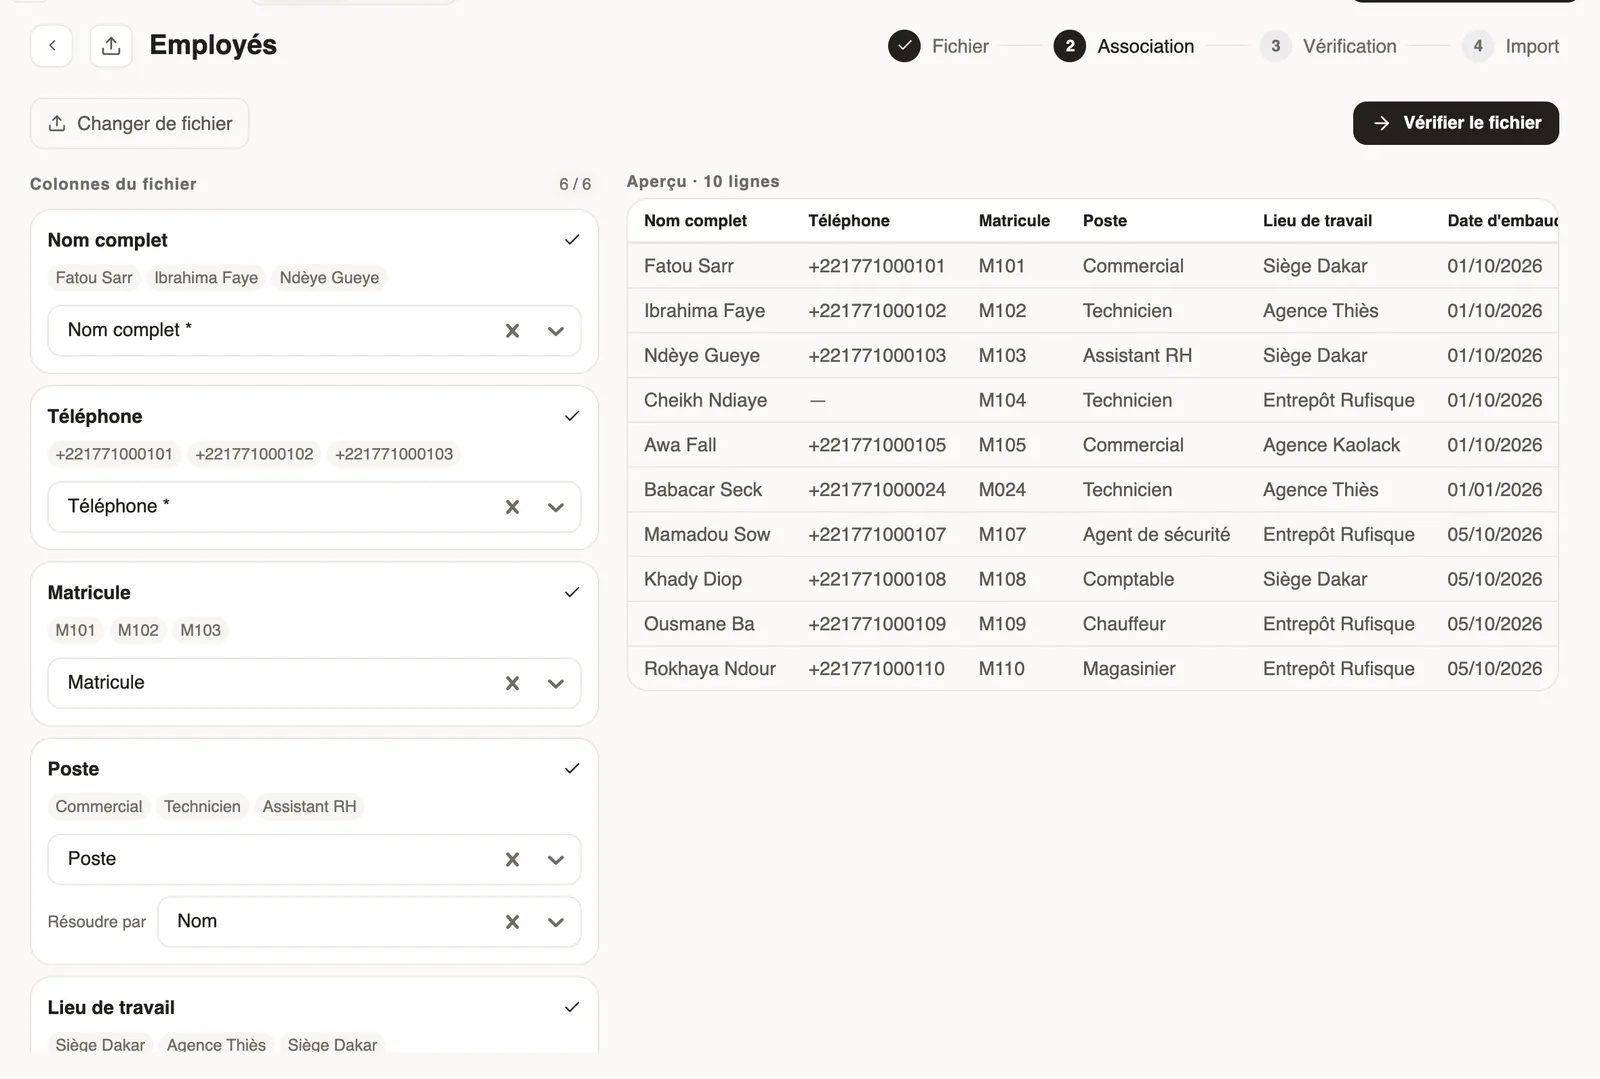
- Click Import on the relevant screen, then drag your Excel or CSV file (10 MB and 2000 rows at most), or Download template.
- Mapping: link each column to a field; the mapping is suggested and kept for next time. For a job or a site, choose Resolve by (name, code…).
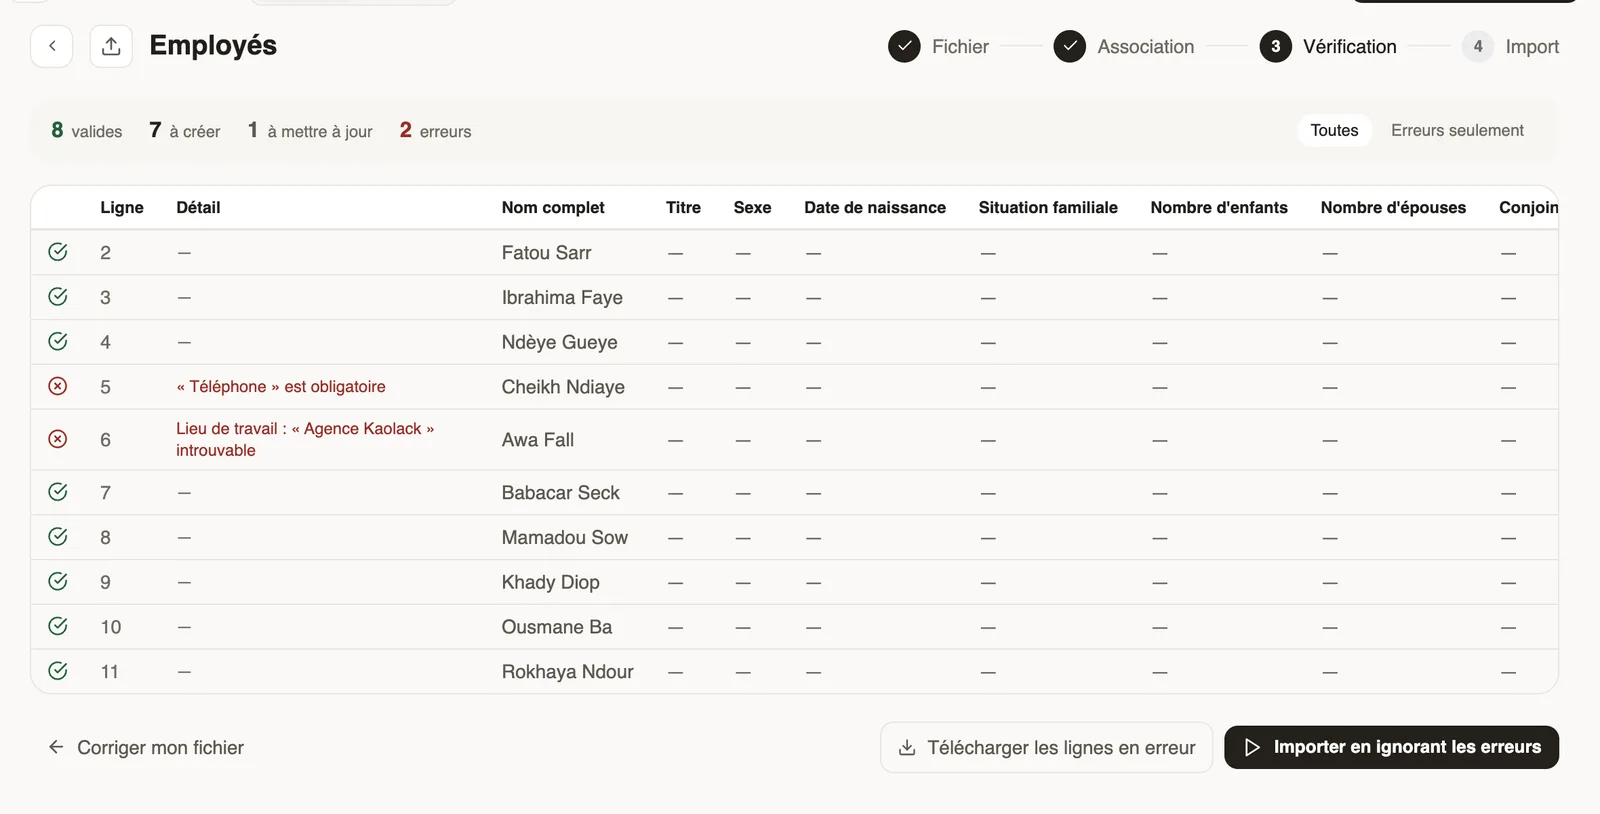
- Click Check file: each row is valid or in error, with the reason.
- Fix my file, Download error rows, or Import ignoring errors.
Good to know
- A row already known is updated, never duplicated: the counter separates rows to create and to update.
- For a CSV file, separate the columns with commas.
- Most common case: importing your employees.
Go further
Import your employees from ExcelIn Weplanify, create or update dozens of employees at once from an Excel or CSV file, each of them being recognised by their own phone number.Create and set up a siteIn Weplanify, declare your workplaces, their geolocation clock-in area, their time zone and their own overtime rules, one site at a time here.Follow employment contractsIn Weplanify, the Contracts page lists every employee's contracts, spots those nearing their end date and lets you create or import new ones.Import payroll history at installationIn Weplanify, import the payroll totals paid before you started using it, so that annual totals, the annual statement and allowances start out right.