
Create a form and add its questions
In Weplanify, create a form from your need and a ready-made template, then adjust its questions while the phone preview shows what employees see.
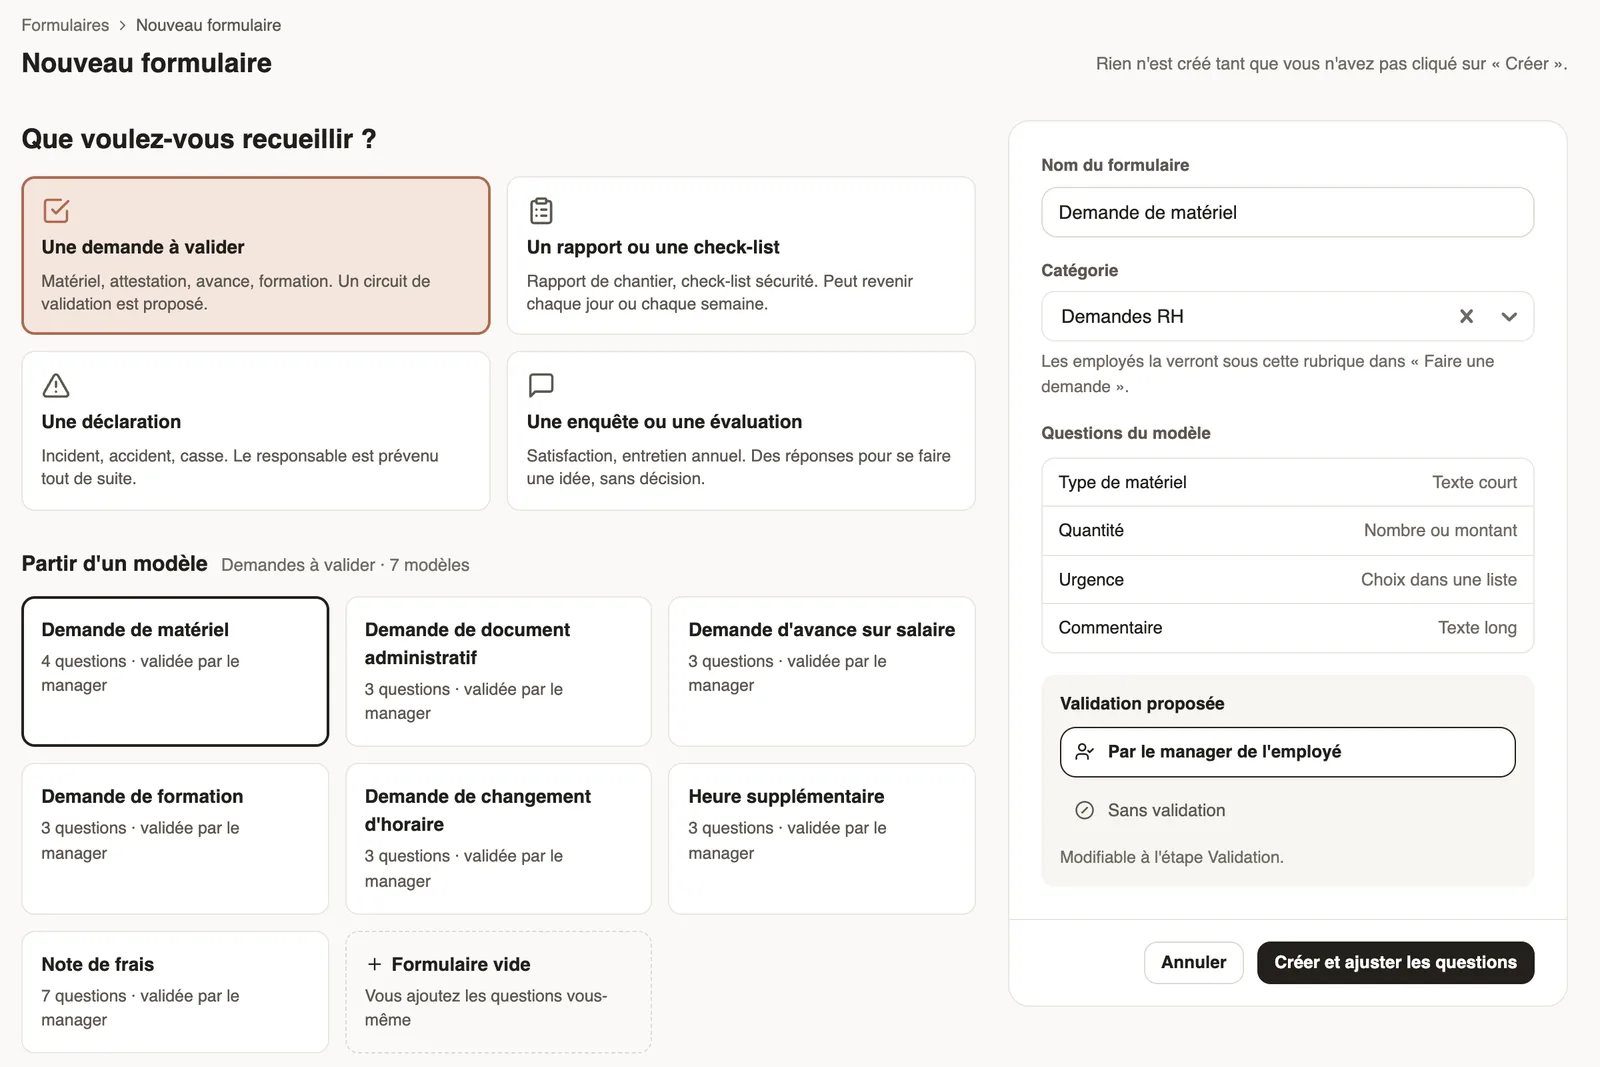
In Weplanify, a form is created in three steps: Questions, Validation and Sharing. Nothing is created until you click Create and adjust the questions.
Steps
- In Requests → Forms, click New form.
- Answer What do you want to collect?: A request to approve, A report or a checklist, A declaration or A survey or an evaluation.
- Pick a template under Start from a template, or Blank form. On the right, check the Form name, the Category and the Suggested validation.
- Click Create and adjust the questions: the Questions step opens.
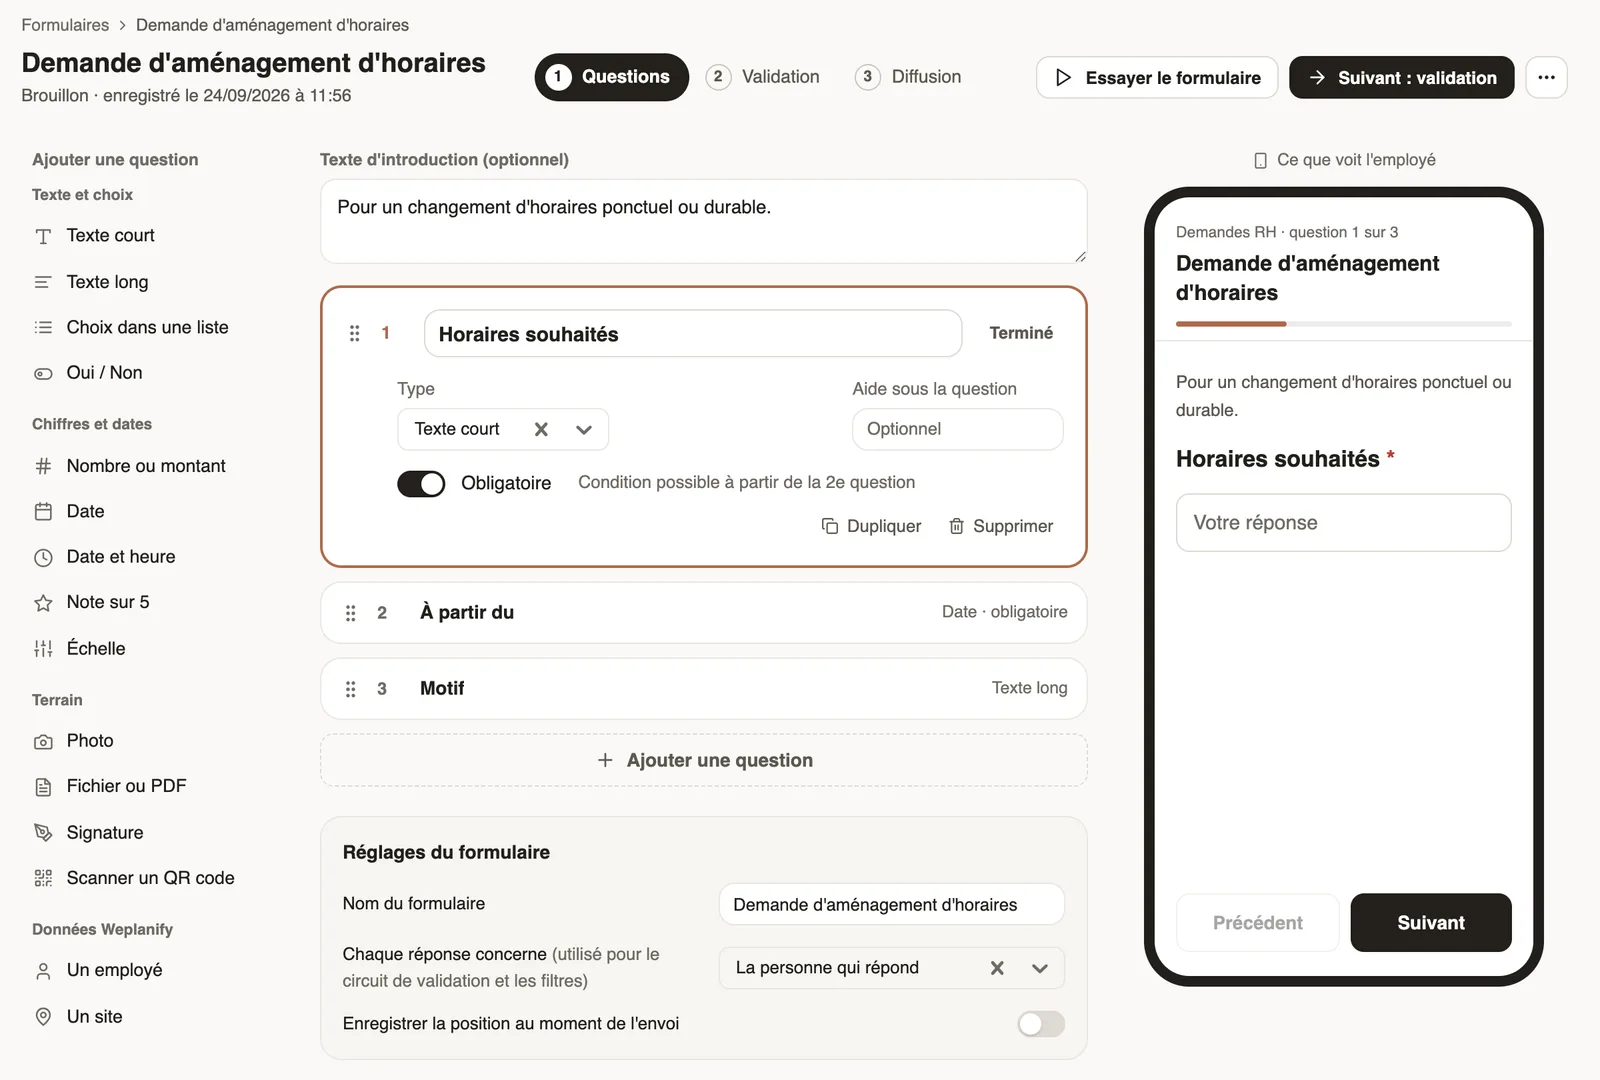
- In the Questions step, click a type in the Add a question column (Short text, Choice from a list, Date, Photo, Signature, An employee…), write the wording and turn on Required if needed; Done folds the question.
- Click Next: validation to choose who approves (approval circuit), then Next: sharing.
Good to know
- Every change saves itself: the header shows "saved at" with the time.
- The What the employee sees preview follows your changes; Try the form lets you fill it in as an employee, without sending anything.
- Show only if… displays a question depending on an earlier answer. Drag questions to change their order.
- To link each response to an employee or a site: the subject of a response. Next: who can answer.
Go further
Choose who can answer a form, and whenIn Weplanify, a form's Sharing step sets who can answer it (everyone, some sites, some groups or some people) and during which period of time.Link each response to an employee or a siteIn Weplanify, link each response of a form to an employee or a site: for an evaluation, an inspection or an incident report written on the ground.Configure an approval circuitIn Weplanify, build the approval steps of a leave request, an expense, an advance or a form: the order, the name, the approver and when each step applies.Weplanify forms: requests, reports and surveysIn Weplanify, every company form sits in a single list, sorted by category, showing what is waiting for your decision and what is running late.Receive employees' HR requestsIn Weplanify, HR requests is a category of forms (equipment, certificate, working hours) that employees find in their Make a request screen.Run a survey or an evaluation with your employeesIn Weplanify, run a satisfaction survey or an evaluation with your teams, without any approval step, and read the results question by question.