
Declare your clients
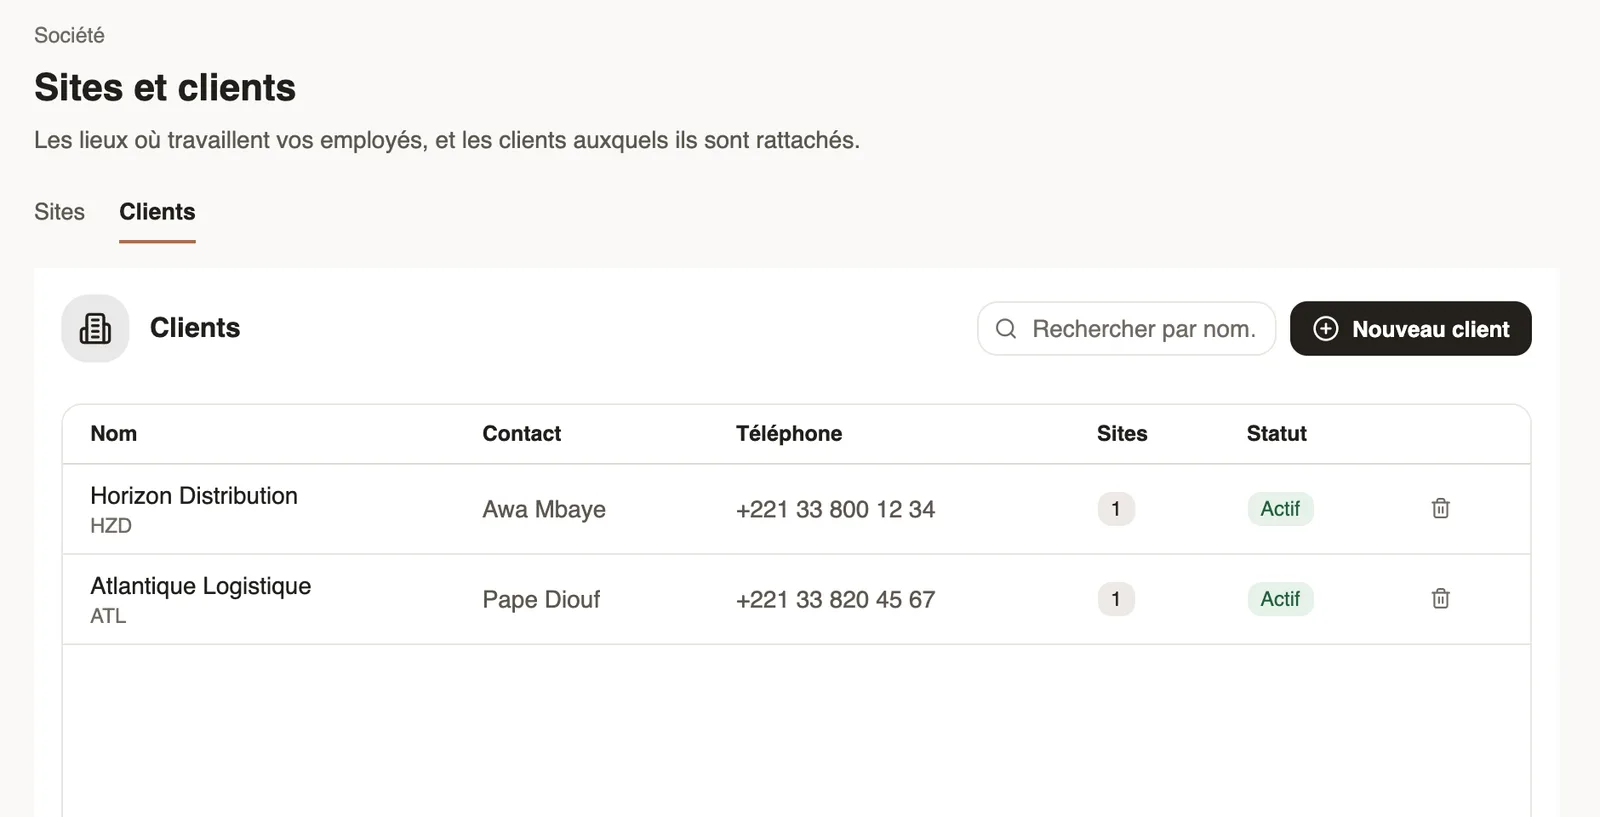
In Weplanify, create your clients to attach to them the sites where your teams work for them, with their contact and their accounting account.
In Weplanify, a client groups the sites where your teams work for them, for example for a security or cleaning company.
Steps
- Open Settings → Sites and clients, Clients tab, then New client.
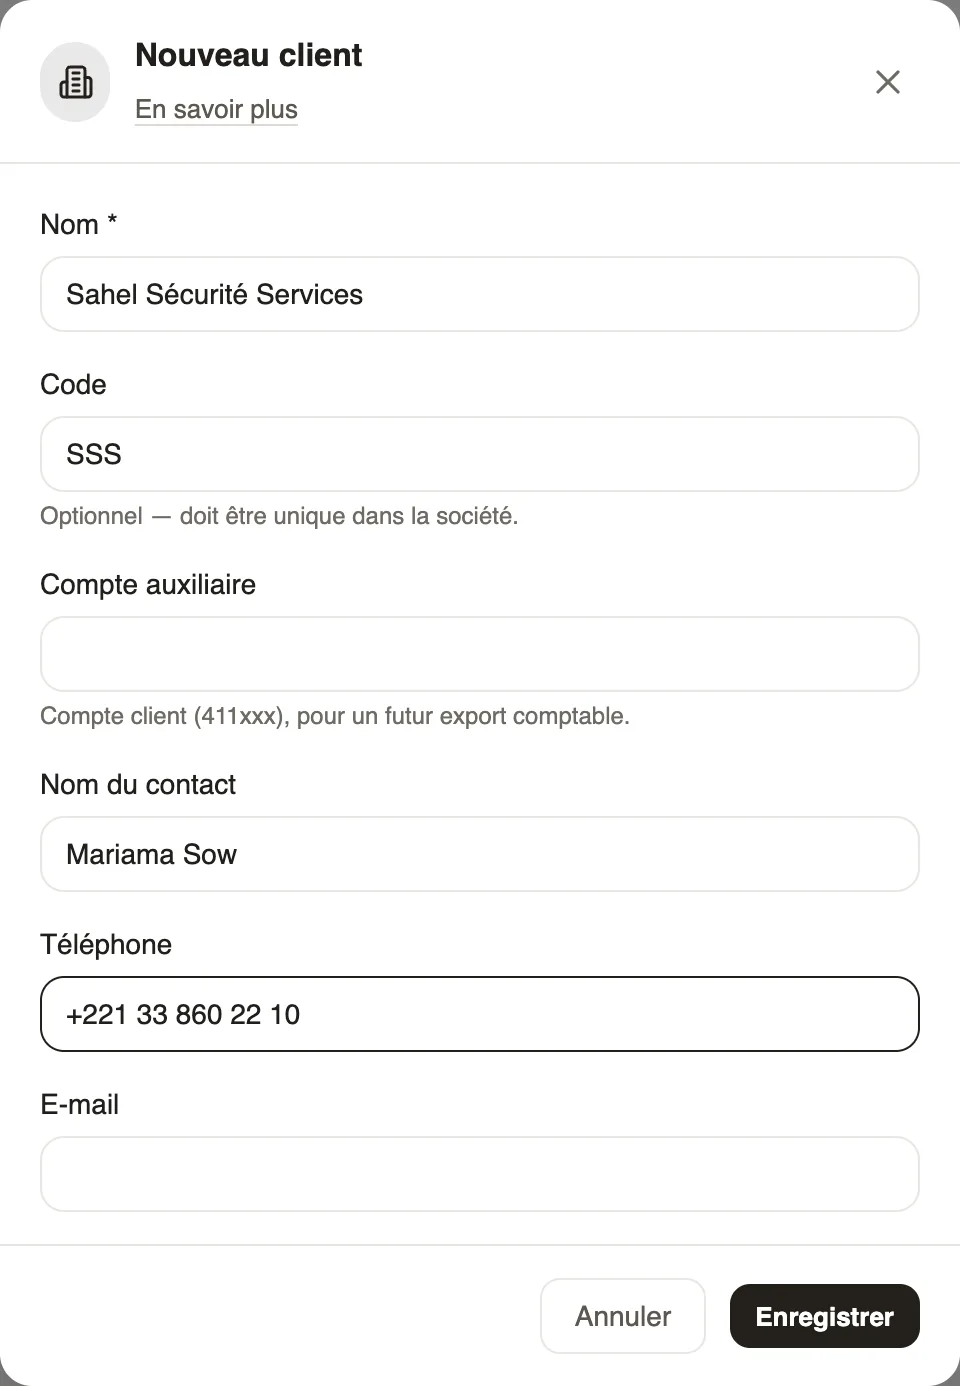
- Enter the Name and, if needed, a unique Code and a Receivable account for the accounting export.
- Add the contact: name, phone, email, address; leave Active ticked. Save.
- Attach sites to the client with the Client field of each site.
Good to know
- The Sites column counts the sites attached to each client.
- An inactive client is no longer offered on sites.
- Staff costs per site are read in the cost analysis.
Go further
Create and set up a siteIn Weplanify, declare your workplaces, their geolocation clock-in area, their time zone and their own overtime rules, one site at a time here.Analyse costs by site, job or departmentIn Weplanify, the cost analysis adds up the month's salaries, day labourers and expenses, then splits them by site, by job or by department, month by month.Your company settings in WeplanifyIn Weplanify, settings are sorted by theme in a menu on the left: company, approvals, expenses, time and attendance, leave, payroll and account.