
Create and set up a site
In Weplanify, declare your workplaces, their geolocation clock-in area, their time zone and their own overtime rules, one site at a time here.
In Weplanify, a site is a workplace: office, agency, warehouse, building site. Employees, slots and clock-ins are attached to it.
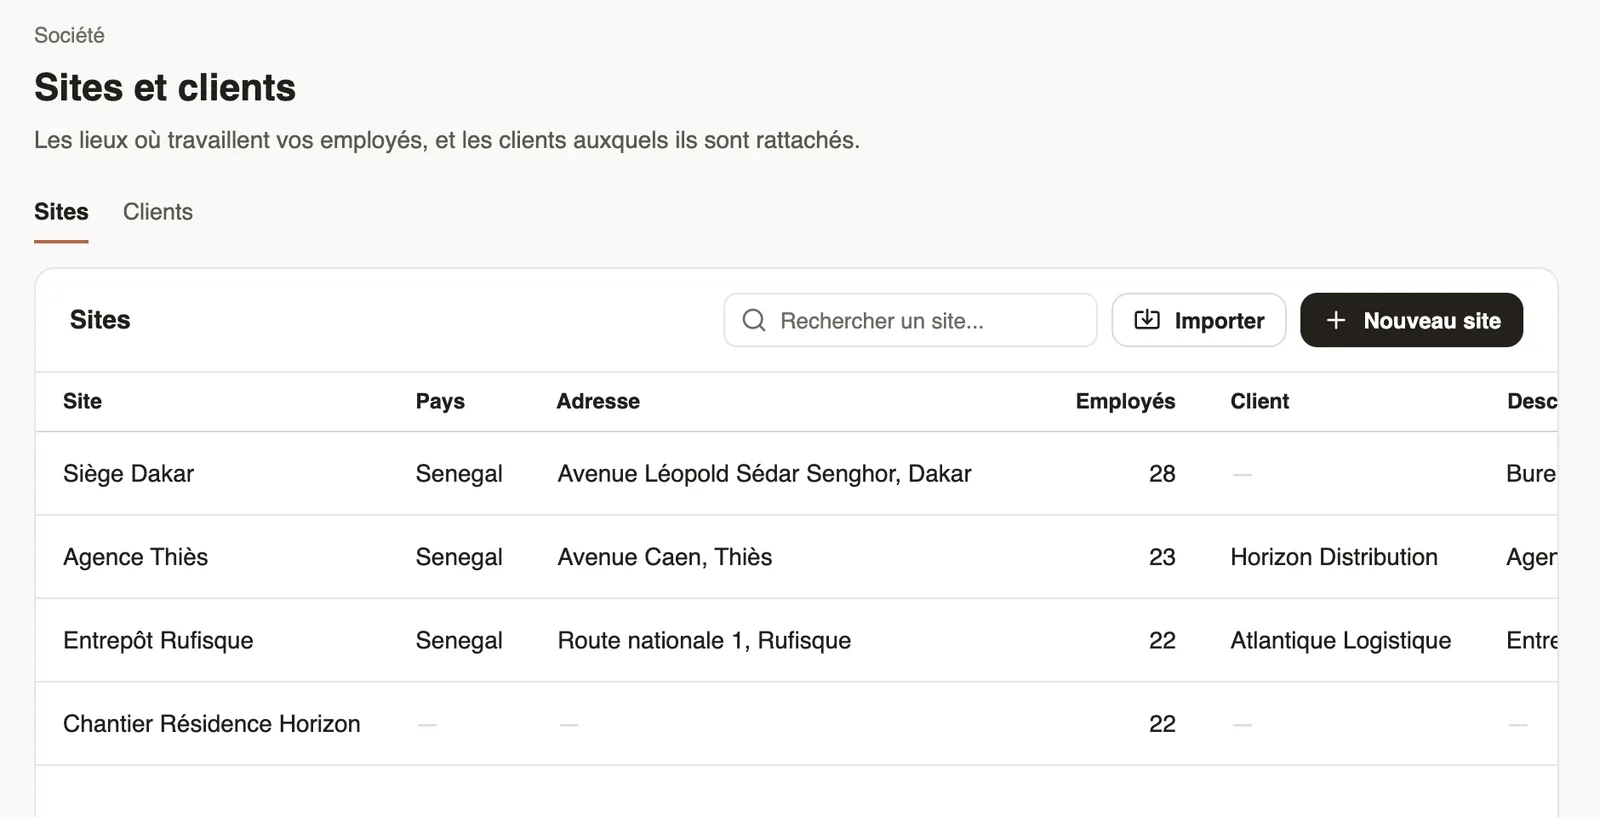
Steps
- Open Settings → Sites and clients, Sites tab, then click New site (or a site to edit it).
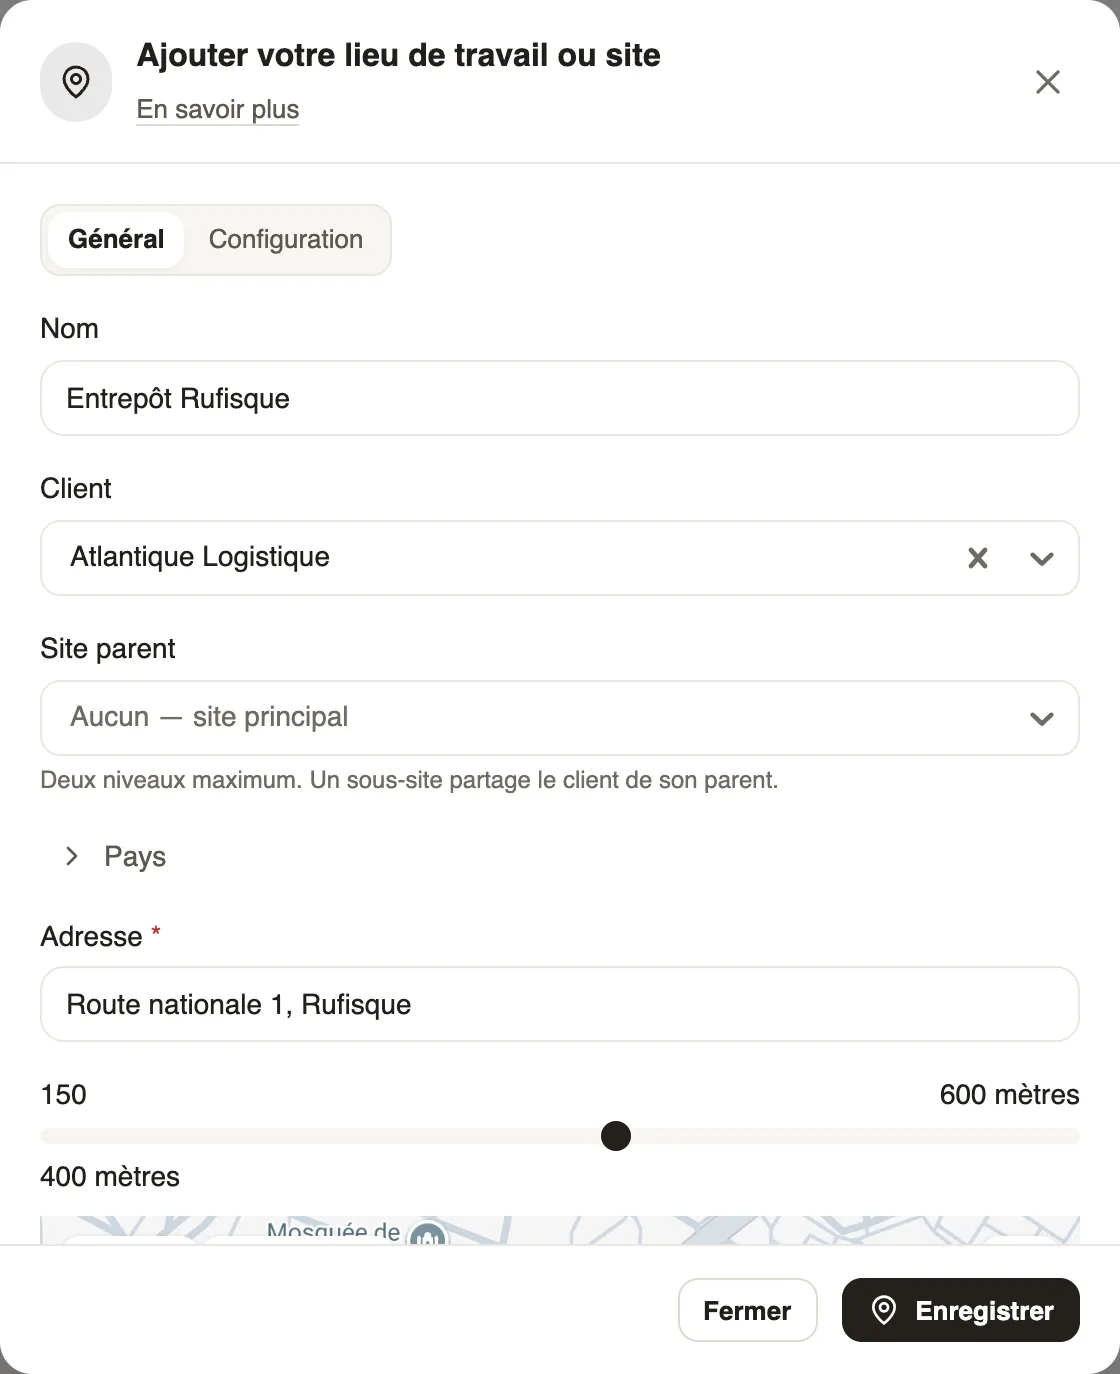
- General tab: name, client, parent site if any, country and address.
- Set the radius around the address (from 150 to 600 metres): it is the area where geolocation clock-in is accepted.
- Configuration tab: the site's time zone, supervisors, overtime threshold and night range for the site. Then Save.
Good to know
- Two levels at most: a sub-site shares its parent site's client.
- The site's time zone decides whether an employee is late or absent.
- For many sites: Import (Excel import). Each site also has its automatically created group.
Go further
Declare your clientsIn Weplanify, create your clients to attach to them the sites where your teams work for them, with their contact and their accounting account.Choose how an employee clocks inIn Weplanify, each employee clocks in one way only, chosen on their record: by scanning the QR code, by geolocation or by facial recognition.Turn on overtime trackingIn Weplanify, turn on overtime counting, then set the weekly threshold, the way overtime hours are approved, and the range of the night hours.Import an Excel file into WeplanifyIn Weplanify, the import wizard goes through four steps, file, mapping, check and import, and writes nothing into your data before the very last one.Create and manage employee groupsIn Weplanify, a group brings employees together for planning, forms, approvals, bonuses and documents, and it also sets a manager's own scope.Clock in from your phoneClock in and out with the Weplanify app, by geolocation on site or by scanning the QR code posted at the workstation.Your company settings in WeplanifyIn Weplanify, settings are sorted by theme in a menu on the left: company, approvals, expenses, time and attendance, leave, payroll and account.Company information, language and time zoneIn Weplanify, update the company's name, sector, address and phone number, the language used for notifications and the company's own time zone.Set up the time clock and overtimeIn Weplanify, allow several clock-ins per day, set the length of a working day and set up overtime tracking for the whole company in one place.Getting started with WeplanifyIn Weplanify, the web is for managers and the mobile app is for employees: here is where to start, from creating the account to the first published schedule.Create your Weplanify workspace with the wizardIn Weplanify, the setup wizard creates your company in five steps: company, business and jobs, working hours, modules, then getting started.Filter a list by site, group, job or contractIn Weplanify, the same filter bar narrows a list or a report down to a group of people: site, department, job, group, manager or contract type.Manage your employees in WeplanifyIn Weplanify, each employee has a record used everywhere: planning, time clock, leave and payroll. Here is how to create it and keep it up to date.Import your employees from ExcelIn Weplanify, create or update dozens of employees at once from an Excel or CSV file, each of them being recognised by their own phone number.Export the payroll accounting entryIn Weplanify, download a month's payroll accounting entry in Excel or CSV, balanced, with an account per employee and the analytical section per site.Choose who approves a step of the circuitIn Weplanify, choose who approves a step: the manager, the head of a site or a department, specific people, or a different person depending on rules.