
Place the signatures on the pages of the PDF
In Weplanify, place each signer's Signature, Name and Date fields on the PDF, with one colour per person, before the document is sent out for signing.
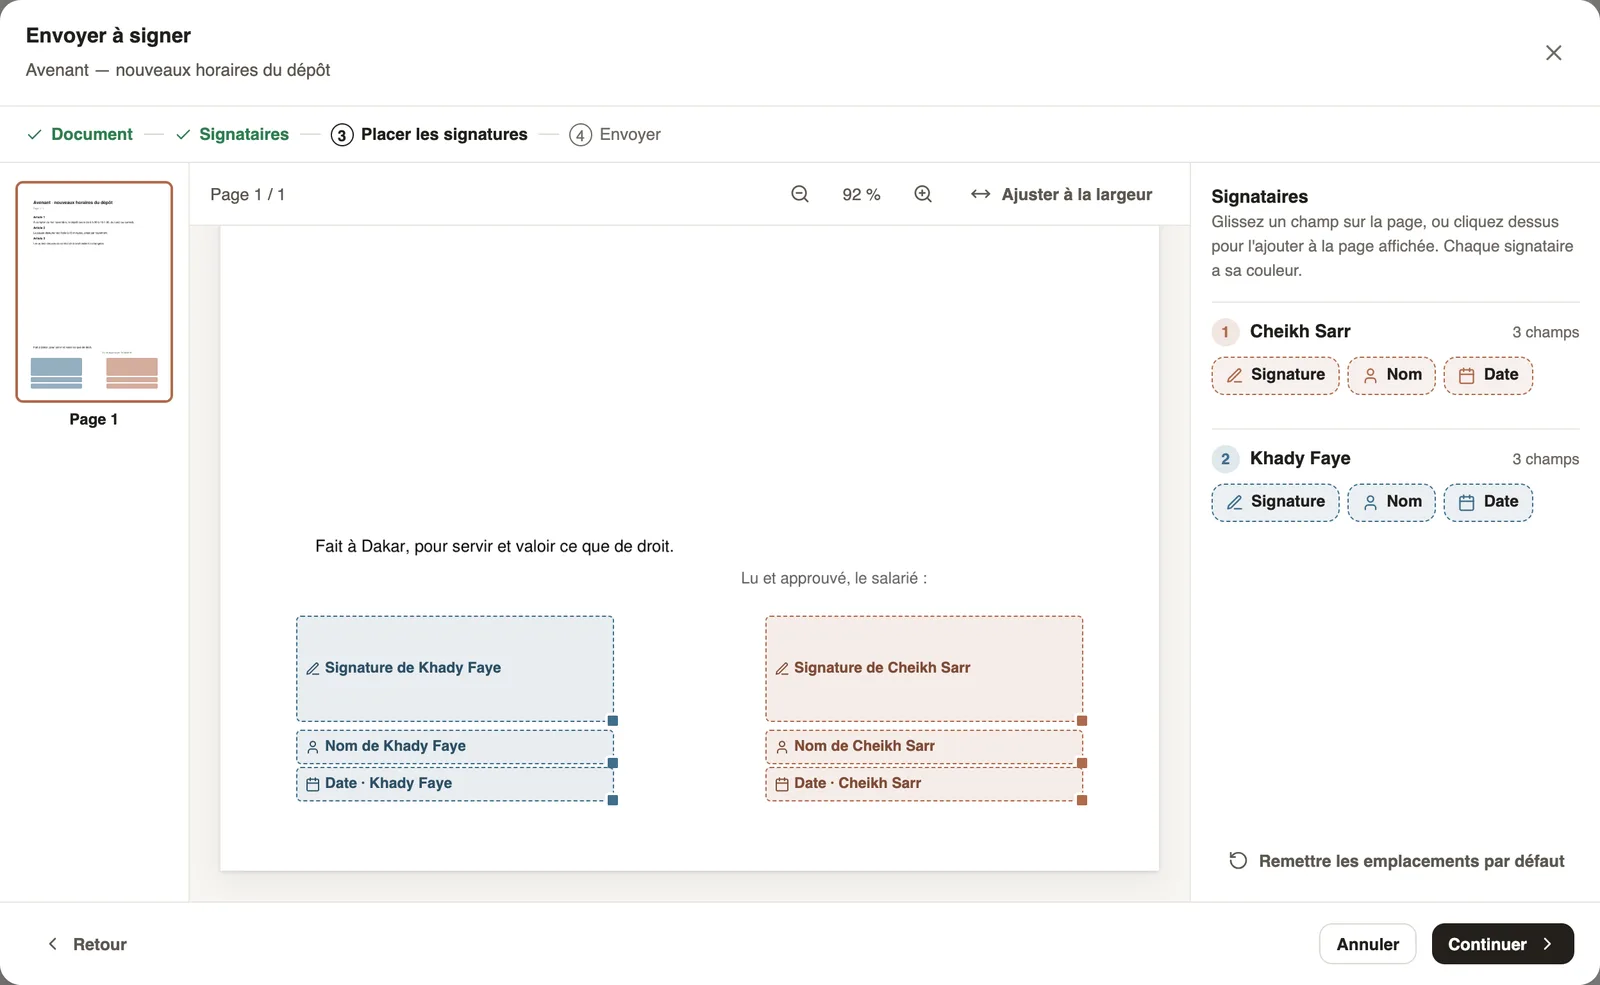
In Weplanify, the Place the signatures step shows the PDF full screen: page thumbnails on the left, the document in the middle, the signers on the right. Each signer has their colour, on the page and in the thumbnails.
Steps
- Check the fields already placed: Weplanify puts one Signature, one Name and one Date per signer below the text of the last page.
- Click a thumbnail to go to a page. Set the size with the magnifiers, or click Fit to width.
- To add a field, drag Signature, Name or Date from the signer's card onto the page, or click it to drop it on the page shown.
- Drag a field to move it, pull its corner to enlarge it. To remove it, click its cross or Delete this field.
- Click Continue.
Good to know
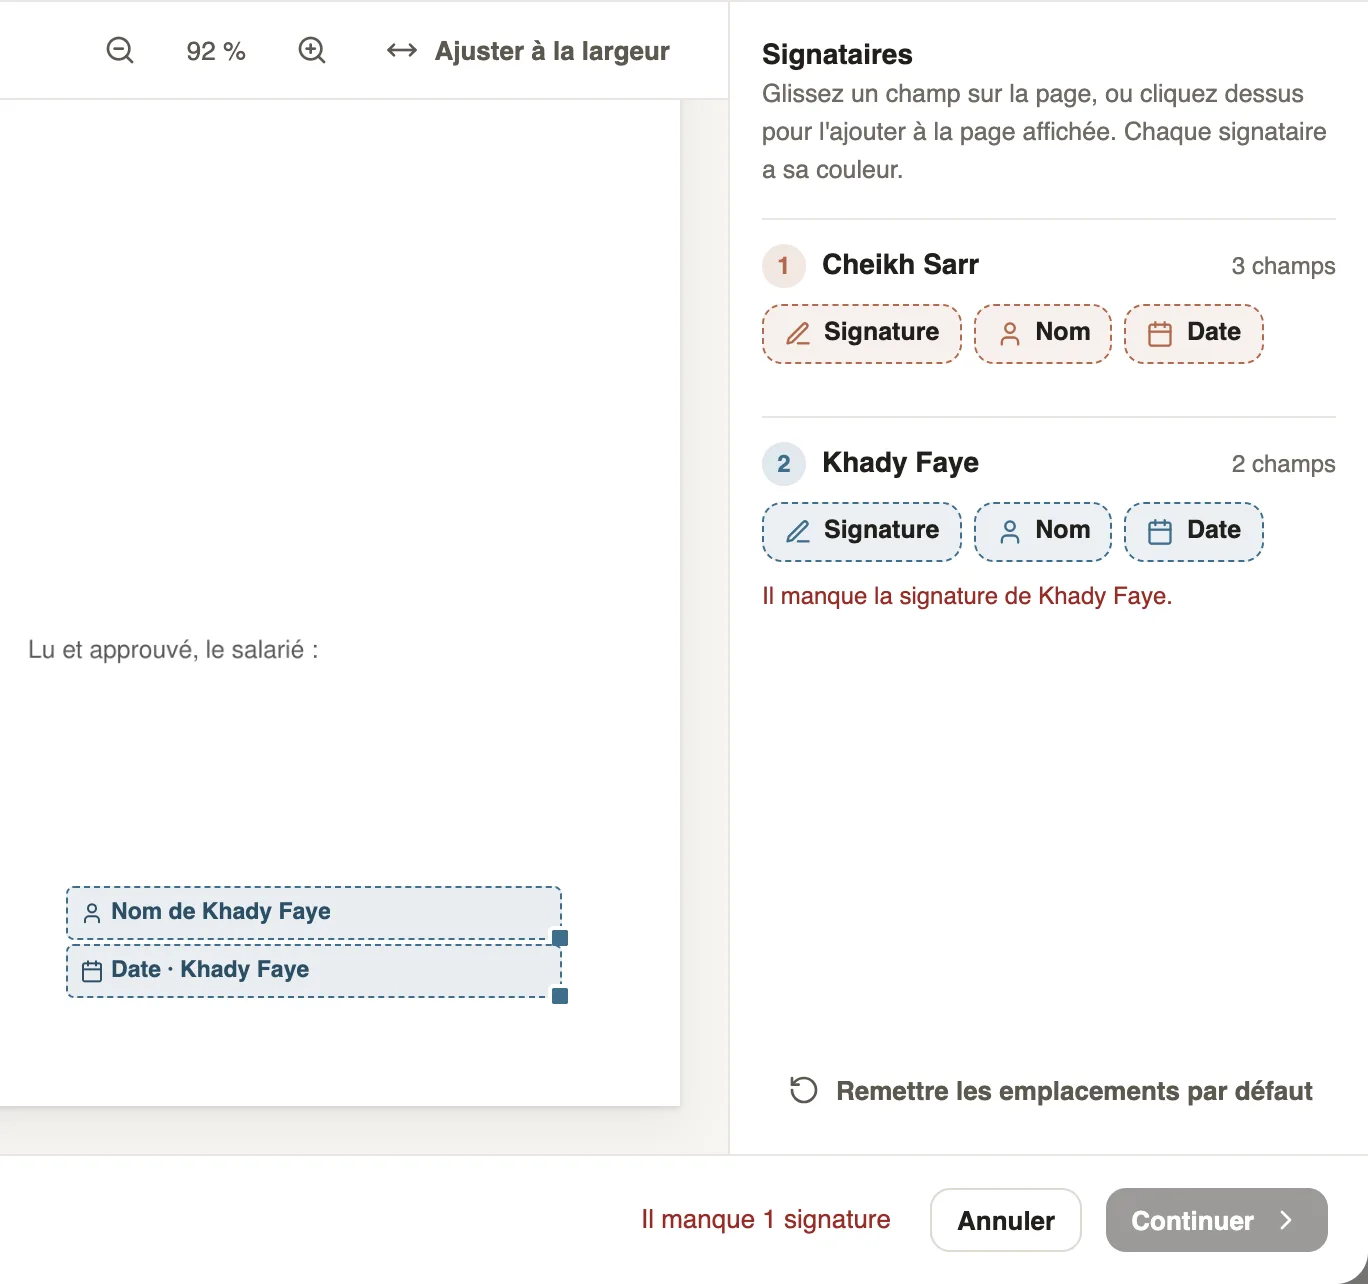
- Continue stays blocked while a signer has no Signature field: Weplanify shows "The signature of … is missing".
- When each person signs their own copy, one set of fields serves everyone: each person fills it in on their copy.
- With the keyboard, a selected field moves with the arrow keys and is removed with Delete.
- Reset to the default positions puts every field back below the text of the last page. If that page has no room, nothing is placed: drag the fields yourself.
- At signing, the Name field receives the signer's name and the Date field the day of signature.
Go further
Send a document for signature in four stepsIn Weplanify, sending a PDF for signature takes four steps: the document, the signers, where each one signs, then a final check before you send it.Choose who signs a document and in which orderIn Weplanify, have a document signed by employees, a whole group or someone outside the company, one after the other or each on their own copy.