
DocumentationForms & requestsWeplanify forms: requests, reports and surveysRecruit: job offers and candidate tracking
Set up the selection steps of an offer
In Weplanify, an offer's steps are set in its Steps tab: add, rename, reorder or delete the steps of your selection, between arrival and decision.
In Weplanify, every candidate moves from step to step, from their application to your decision. A new offer has six steps: Received, Shortlisted, Interview, Offer, Hired and Rejected.
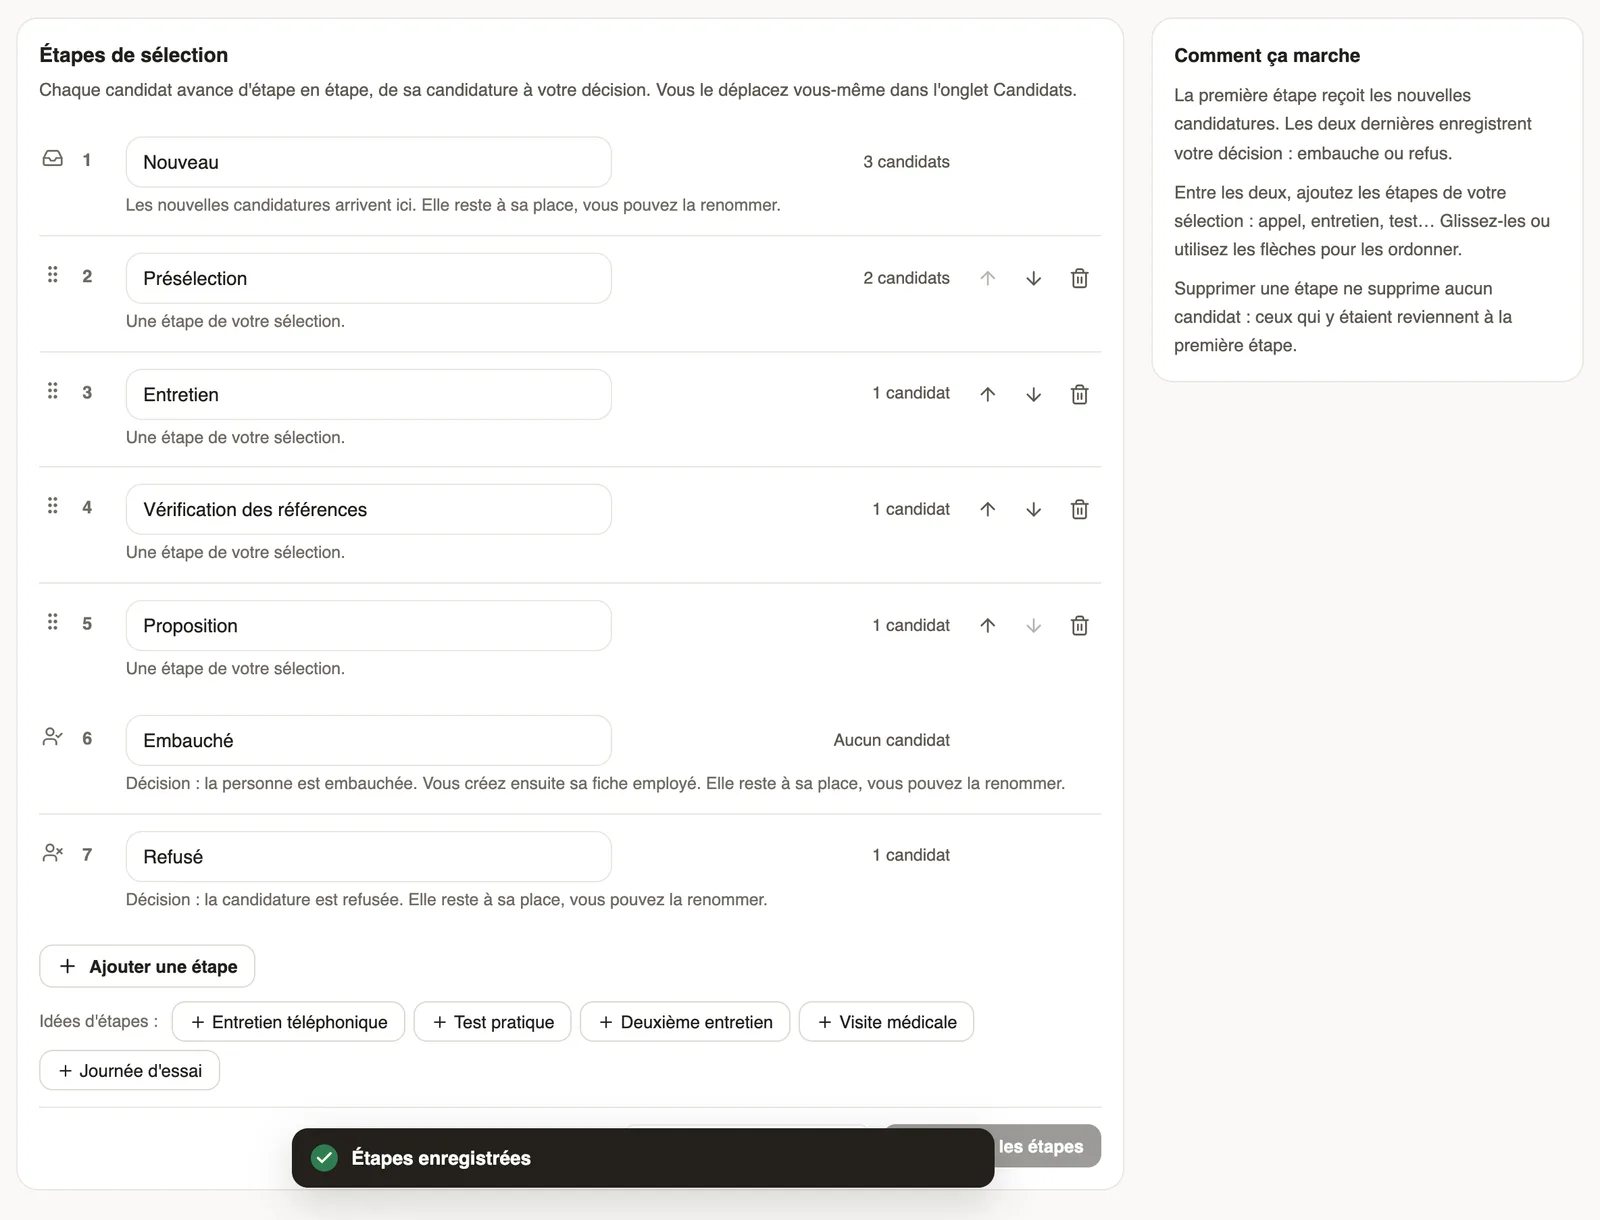
Steps
- Open the offer, then the Steps tab.
- To add a step, click Add a step and name it, or click an idea: Phone interview, Practical test, Reference check, Medical check, Trial day…
- To rename a step, change its name in its box.
- To change the order, drag the step or use the Move up and Move down arrows.
- To remove a step, click the Delete the step bin and confirm.
- Click Save the steps.
Good to know
- The first step receives new applications; the last two record your decision, hired or rejected. These three steps stay in place, but you can rename them.
- Deleting a step deletes no candidate: those who were in it go back to the first step when you save.
- Two steps cannot have the same name; an offer has 12 steps at most.
- An older offer may use other step names: rename them here if needed.
- Next: move the candidates forward.
Go further
Move candidates from step to stepIn Weplanify, an offer's Candidates tab puts each candidate in the column of their step: drag their card, or open it to read the answers and decide.Recruit: job offers and candidate trackingIn Weplanify, Recruitment shows your job offers as cards: create an offer, share its link and follow every candidate from application to hiring.Create a job offerIn Weplanify, a job offer takes a few fields to create: title, job, site, contract and number of positions, then its description and its deadline.The job offer page and its tabsIn Weplanify, every job offer has its own page with five tabs: Candidates, The offer, Application form, Steps and Publication, plus its actions.