
The planning views
In Weplanify, switch from the week's planning to the month's, and read it by employee, by job or by schedule, in hours or in codes (M, D, E, N).
In Weplanify, the same planning can be read in several ways, depending on what you are looking for.
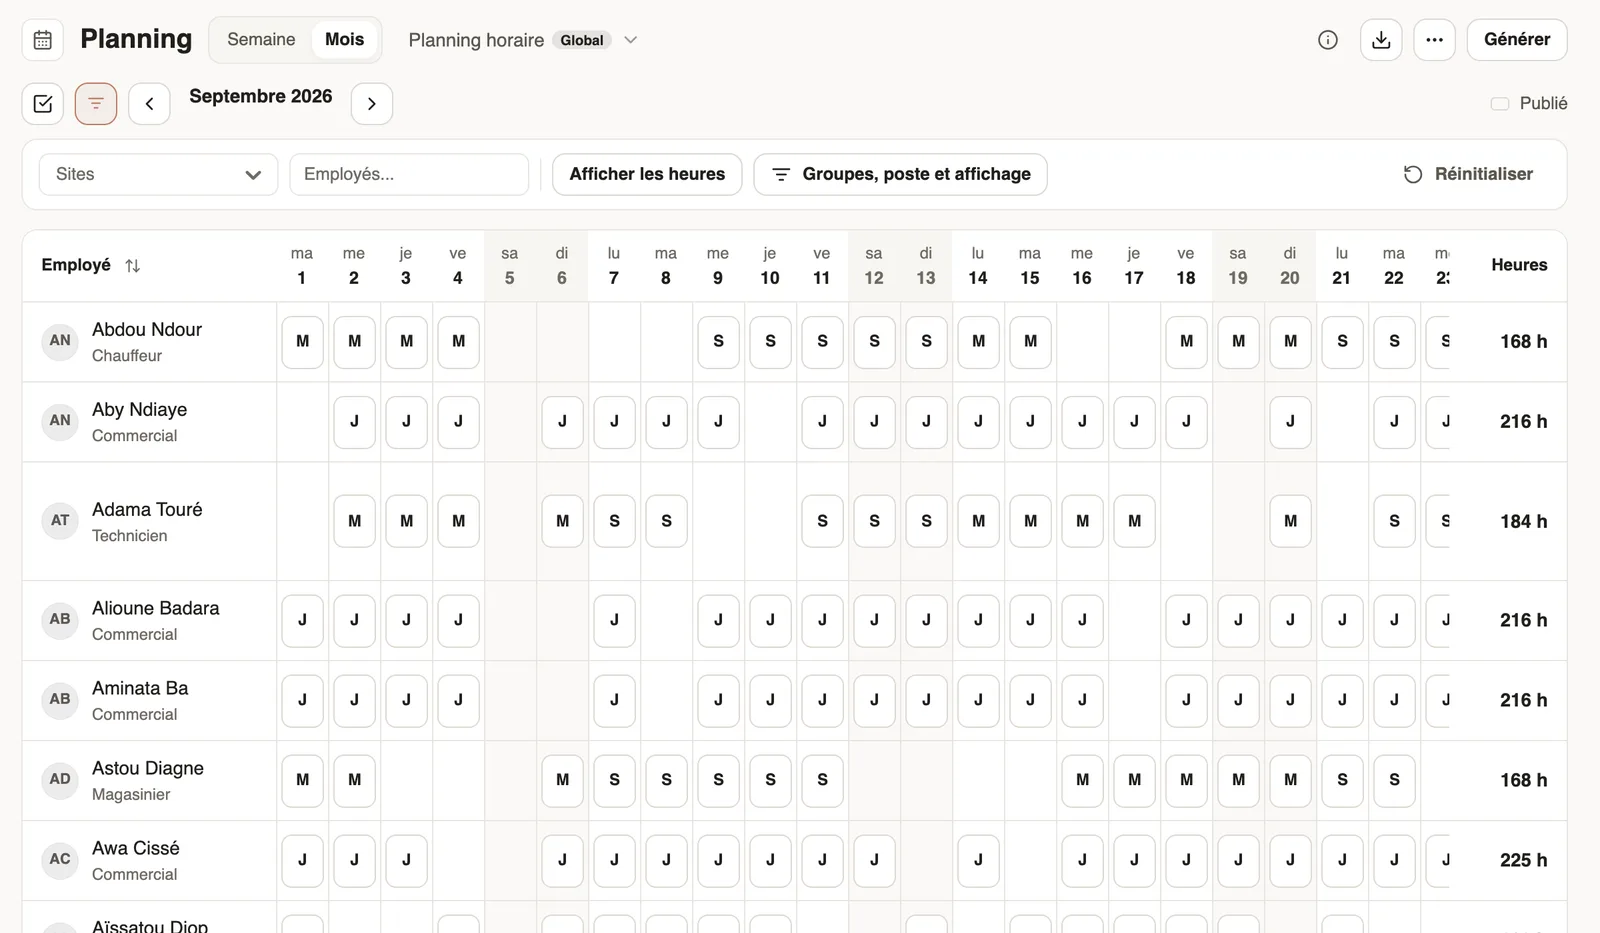
Steps
- Week or Month, at the top: changes the period shown. The arrows move forward or back; clicking the dates opens a calendar.
- In week view, in the filters, Show by: Employees (one row per person), Positions or Schedules (who is on morning, on evening, and who is resting).
- In month view, Show schedule codes replaces the hours with the schedule's initial; Show hours brings the hours back.
Good to know
- The Hours column totals each employee; the Planned staff row counts each day.
- ⋯ → Period statistics shows planned and unplanned employees, slots and hours.
- The Employee column sorts with a click (name, schedule, job, site). To shorten the list: filters.
Go further
Filter and sort the planningIn Weplanify, show only the site, group or job you care about, choose what the slots display, and then sort the employees in the order you need.The team planningIn Weplanify, the planning says who works, when and where, week after week; the slots stay as drafts until you publish them to your employees.Export the planning to PDFIn Weplanify, download the planning shown as a PDF, in compact initials or in full hours, to put it up in the break room or to send it around.Create the work schedules (Morning, Evening, Night)In Weplanify, define the Morning, Day, Evening and Night schedules once, with their break and days, then pick them in one click in each slot.Manage the planning's jobsIn Weplanify, keep the list of jobs (driver, storekeeper…) used in slots up to date; each job's colour outlines its slots so the grid is easy to read.