
Add a document
In Weplanify, add a file with its name, its type, the employee concerned, its expiry date and whether the employee may download it from the app.
In Weplanify, the Add a document button is at the top right of the Documents tab, in each folder and in the Documents section of the employee record.
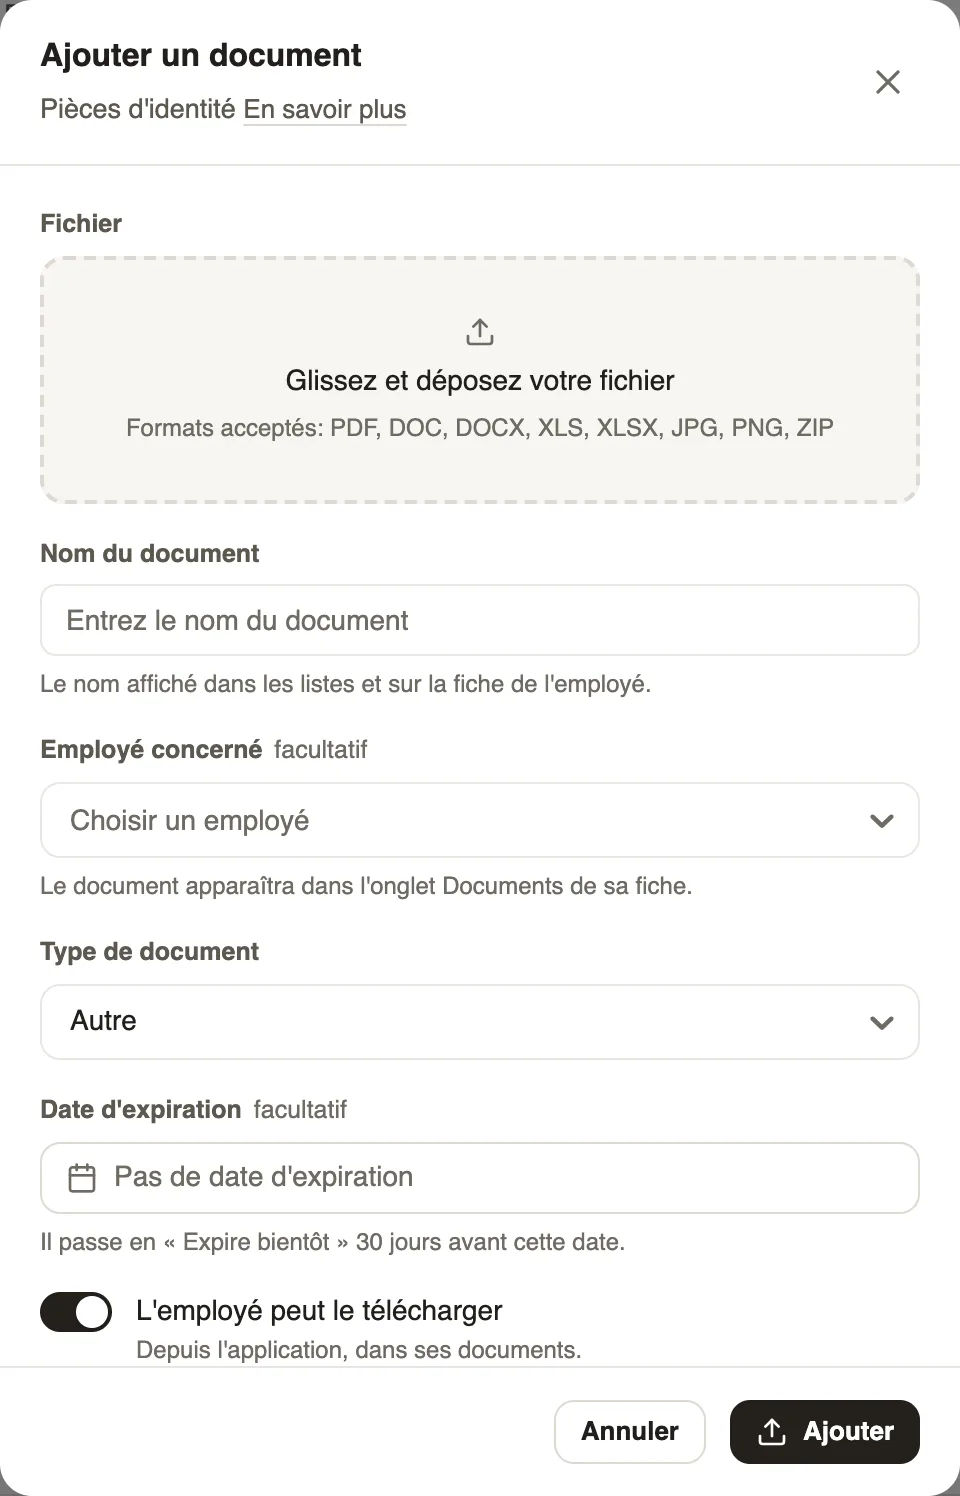
Steps
- Click Add a document.
- Drag the file into the frame or click to choose it (PDF, Word, Excel, JPG, PNG or ZIP).
- Give a Document name: it is what shows in lists and on the record.
- Choose the Employee if the document belongs to someone, then the Document type (contract, ID document, diploma, certificate…).
- Enter the Expiry date if it has one (statuses).
- Leave The employee can download it on so they find it in the app, then click Add.
Good to know
- Added from a folder, the document is filed there; from the record, it is linked to the employee (an employee's documents).
- A contract or an ID document linked to an employee completes their staff file.
- To get a PDF signed: send for signature.
Go further
Document statuses and expiryIn Weplanify, understand the Valid, Expiring soon and Expired statuses of a document, and those of a paper requested by collection: To upload, To check.An employee's documentsIn Weplanify, the Documents section of the employee record gathers their papers by type: contract, ID document, certificates and signed copies.Spot incomplete staff filesIn Weplanify, Staff files show for each employee where their contract, ID document, collections and documents to sign stand, in a single row.Send a document for signature in four stepsIn Weplanify, sending a PDF for signature takes four steps: the document, the signers, where each one signs, then a final check before you send it.HR documents in WeplanifyIn Weplanify, the Documents module files HR papers, spots incomplete staff files, gets PDFs signed and collects documents from your employees.Organise documents in foldersIn Weplanify, create folders (Contracts, ID documents, Medical check-ups…) to file company documents and those of your employees in one clear place.The document list and its countersIn Weplanify, the Documents tab lists every filed paper, with the Expired and Expiring soon counters and filters by type, folder, employee and status.