
DocumentationForms & requestsWeplanify forms: requests, reports and surveysReport and follow up incidents in the field
Filter and export the incident list
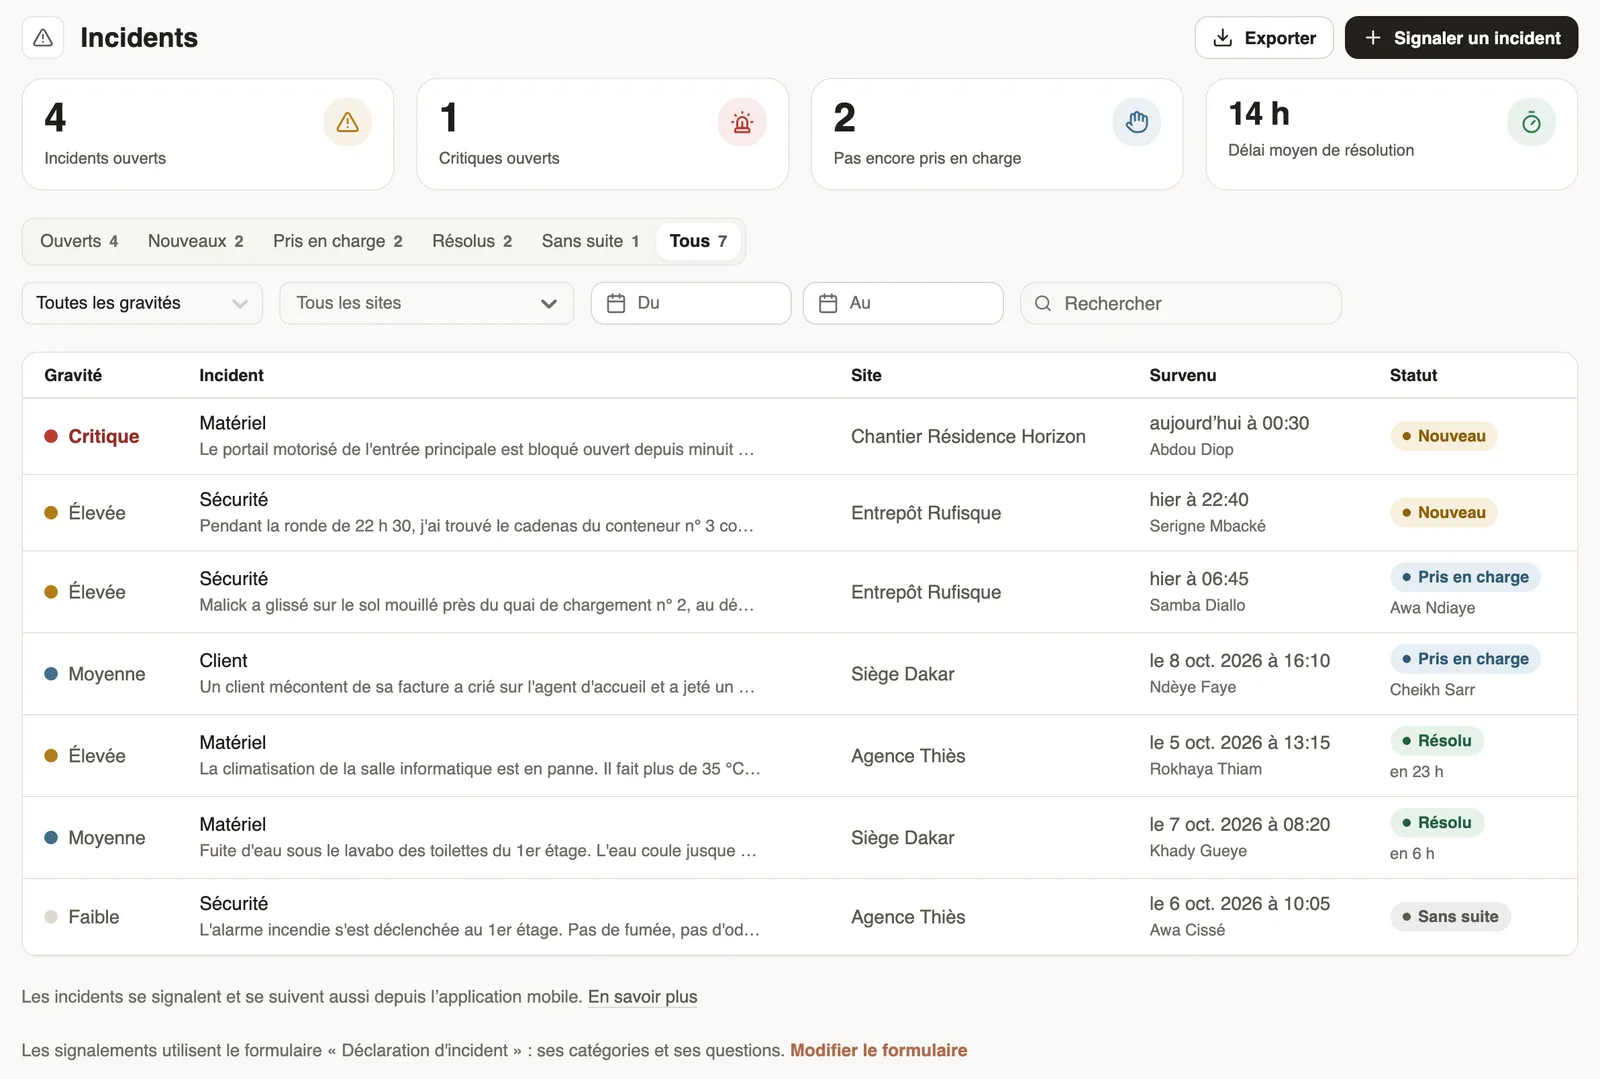
In Weplanify, the Incidents screen shows open and most serious incidents first, with its indicators, its filters by site or by date and an Excel export.
In Weplanify, Requests → Incidents gathers the incidents you can handle: open ones first, the most serious at the top, then the most recent. The menu badge counts the incidents not taken in charge yet and those assigned to you.
Steps
- Read the indicators: Open incidents, Critical open, Not taken in charge yet and Average resolution time. Click one of them to filter the list.
- Switch tabs: Open (by default), New, Taken in charge, Resolved, Closed or All, each with its count.
- Narrow down by severity, by site, with From and To (the date of the incident) or Search: text, category, site, reporter or person in charge. Clear the filters resets everything.
- Click a row to open the incident on the side.
- Export downloads an Excel file of the filtered incidents: dates, site, category, severity, reporter, status, person in charge, resolution time and note, reason for closing.
Good to know
- The resolution time runs from the report to the resolution; incidents closed without action do not count.
- The indicators follow the severity, site and date filters and the search.
- Below the list, the administrator sees which form is used for reports, with Edit the form to change its categories or questions.
- An employee sees My reports here: their incidents and where they stand, without indicators or export. If an incident was handed to them, an Assigned to me tab is added: they find the incidents to resolve there.
- To handle an incident: take charge or assign.
Go further
Take charge of an incident or assign itIn Weplanify, a manager takes charge of an incident or assigns it to an employee, corrects its details and talks with the reporter in the follow-up thread.Report and follow up incidents in the fieldIn Weplanify, an incident is reported in a few seconds and warns the site manager, who takes charge of it and then resolves it with a short note.Get notified of incidents and critical alertsIn Weplanify, each incident notifies the managers of its site; a critical incident also alerts the administrators right away, through a notification.Resolve, close without action or reopen an incidentIn Weplanify, an incident ends Resolved, with a note of what was done and a photo, or Closed without action with a reason. It can be reopened at any time.